Managing your team inbox goes well beyond answering emails. You spend time fishing out the most important ones so you can tackle them first, then you need to delegate emails to the right team members, and make sure no message is left behind while new ones are coming in.But emails can slip through if not properly archived, risking double replies.
On top of that, each time your team members check their inbox, it takes them 23 minutes before they can fully focus on a task again. Knowing that working people send and receive 121 emails per day on average, it doesn't take a lot of math to realize there's a high time cost to bouncing between tasks and emails.
Since you can't stop people from emailing you, how do you organize Gmail in such a way that it becomes a productivity aid, rather than a drain? We've collected our favorite tips for how to organize Gmail to improve your team's workflows below.
Streamline your team's inbox and boost productivity! Try Gmelius to save time and keep everyone on track.
1. Set Up Gmail Inbox Types to See Important Emails First
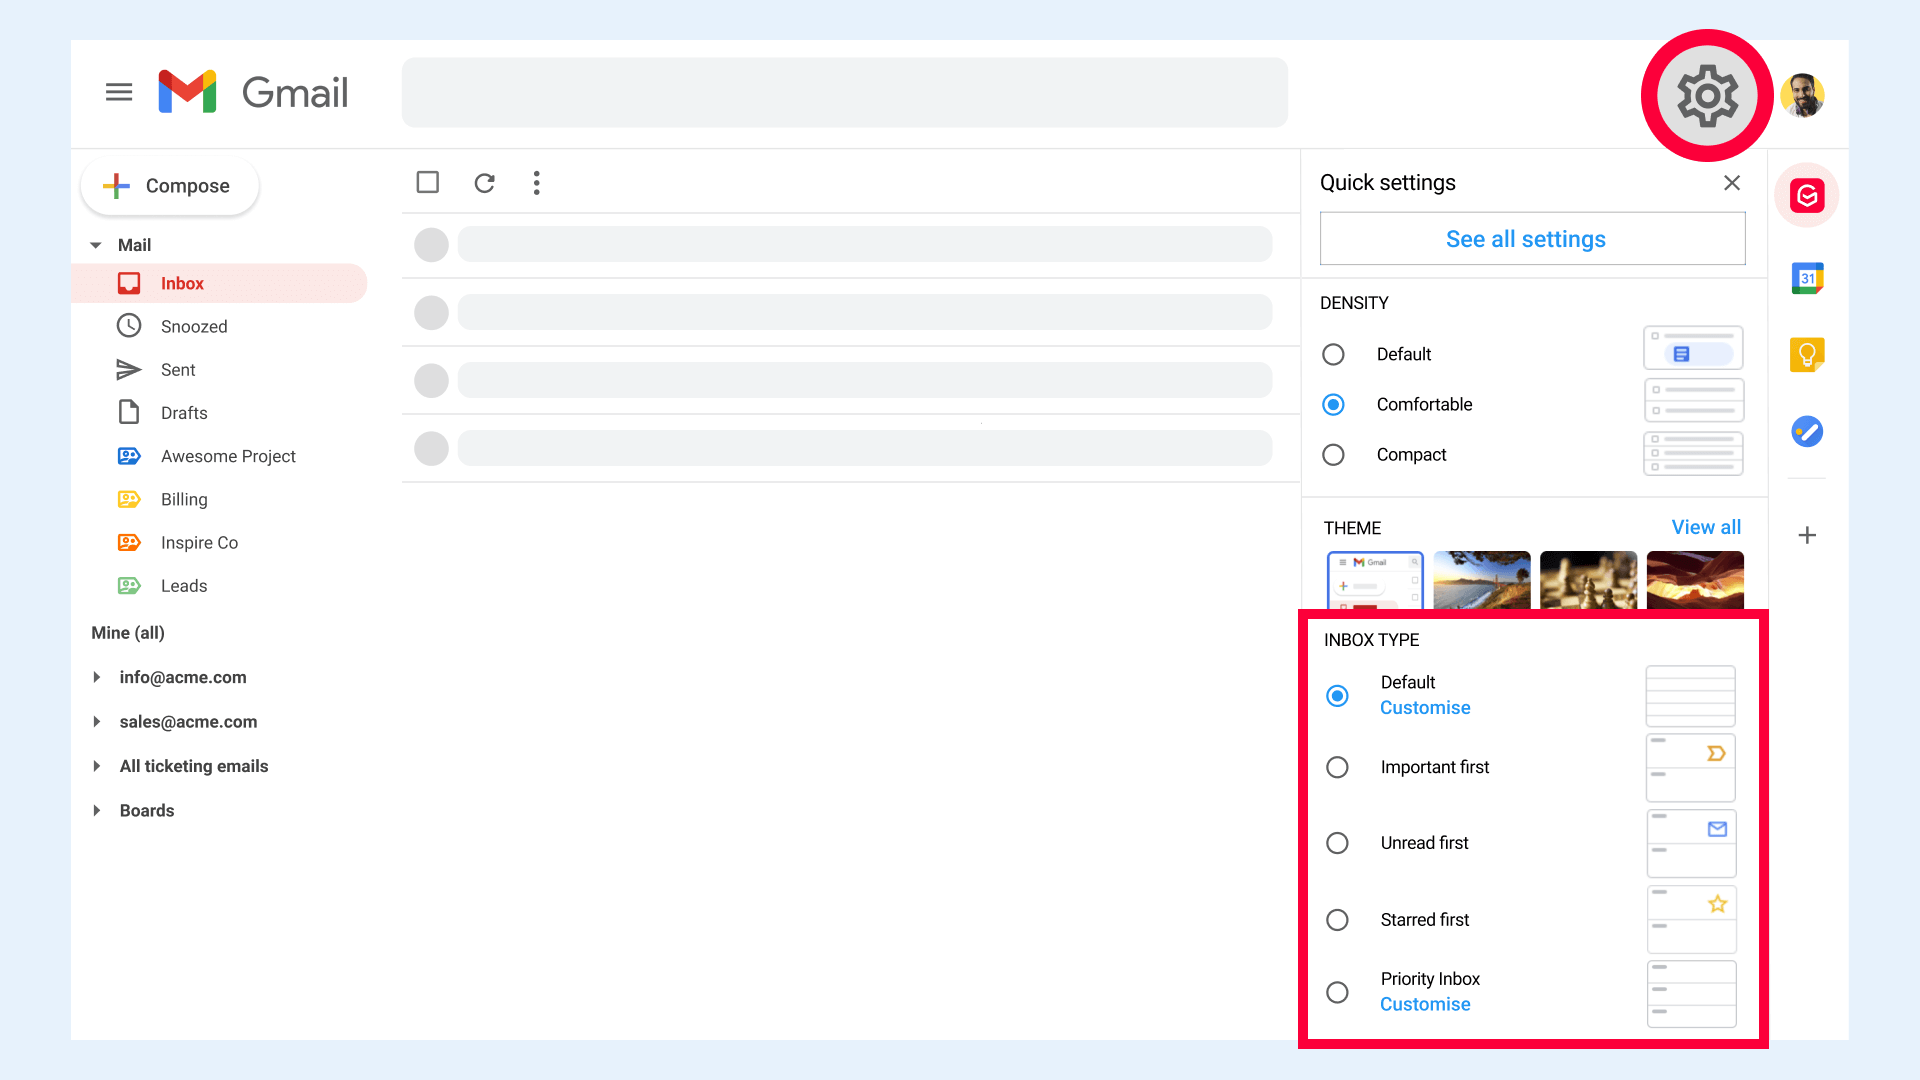
When you go to Gmail > Settings > Inbox, you can select which emails appear at the top of your inbox by selecting a certain inbox type. Gmail currently has six different priority options:
- Default: This is the regular inbox view where the newest email is shown at the top.
- Important first: When selecting this option, Gmail displays the emails it thinks are most important to you at the top of your inbox. You can train Gmail to get better at this by clicking the "important" marker next to a sender's name.
- Unread first: Rather self-explanatory, this inbox type moves all of your unread emails to the top, regardless of when you've received them.
- Starred first: If you manually star emails to indicate their importance, this inbox type is a good option as it will put all of your starred emails at the top.
- Priority inbox: The priority inbox splits your emails into various sections, showing what Gmail thinks are your most important emails at the top, followed by your unread emails, your starred emails, and then everything else. You can change the order of these sections and create new ones as well.
- Multiple inboxes: The multiple inboxes option allows you to create five different inboxes alongside your regular inbox based on custom search queries. This way, you could create an option for your most important client, one for all your starred messages, one for unread messages, and so on.
2. Hit snooze on Emails You Don't Need to Handle Right Away
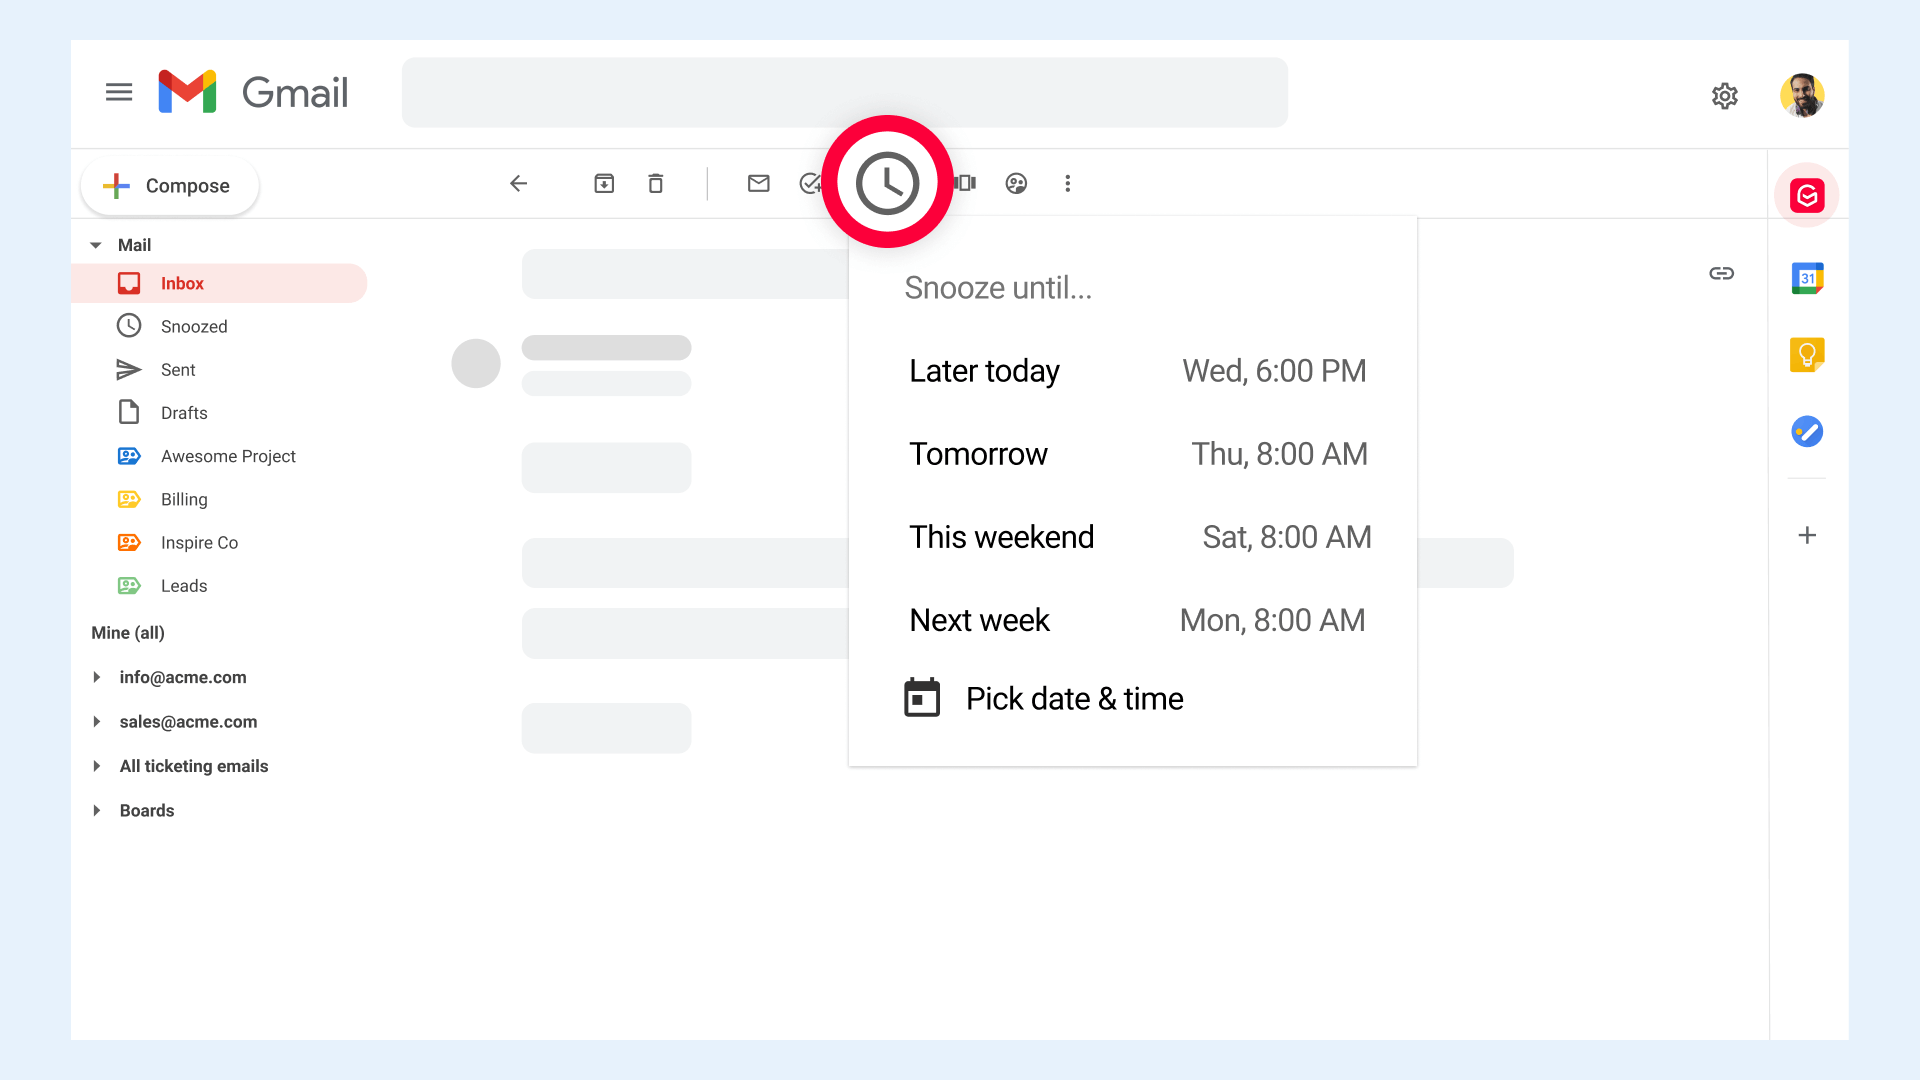
Just like you do with your alarm, Gmail allows you to snooze emails until a later date and time. This function is great for emails you'll need to deal with at some point, but not right now. Say you've been getting material for a project you won't work on until next month, you can snooze all of those emails until then.
By snoozing an email, it'll disappear from your inbox, decluttering it and allowing you to focus on more pressing matters.
The downside of Google Snooze is that it has four preset reminder options (later today, tomorrow, this weekend, and next week) which you can only change within Google Keep, and when you do, it also changes the preset reminder times for Google Keep. Google Snooze does also have one custom option which allows you to fill in a different time and date for every email you snooze.
3. Get Nudged About Emails that Require action
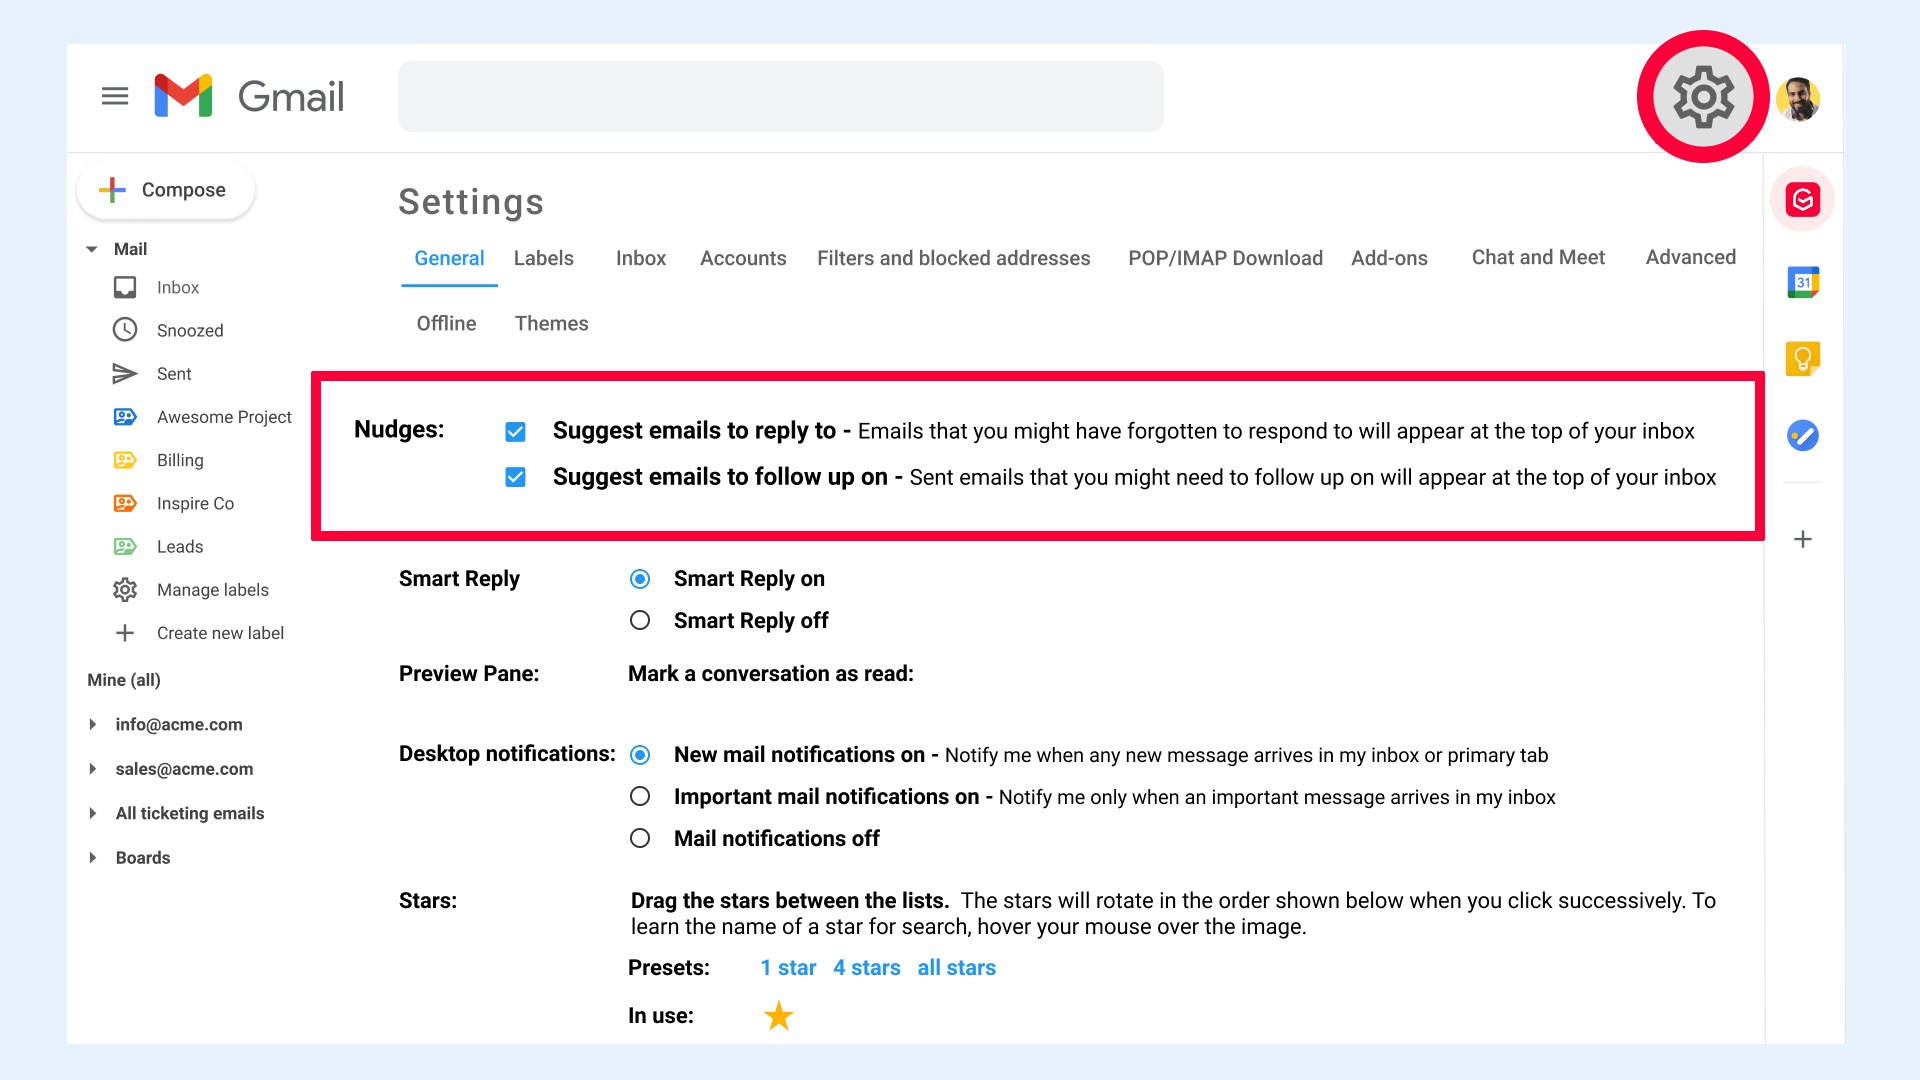
Nudges is a Gmail feature that alerts you of emails you still have to reply to as well as emails you've sent that still need to get a reply. The downside is that you rely on Gmail's algorithm for emails to be resurfaced.
You can't set nudges manually and so you can't tell Gmail which emails you expect to get a reply to and which emails you should reply to yourself at some point. For the latter, it's better to use the Snooze feature.
To set up Nudges, go to Settings > General and scroll down until you reach the Nudges section. Note that to be able to enable Nudges, you need to turn on smart features and personalization in Gmail.
4. Label Emails to Organize Gmail More Efficiently
If you're wondering how to organize emails in Gmail, labels are the answer. Gmail allows you to organize your emails by adding labels to them. A label acts in the same way as a tag and you can add various labels to one email. An email containing client feedback on a project, for example, could be labeled with the client's name, the project name, and "In Progress".
You can organize Gmail labels hierarchically as well as by creating parent labels and sub-labels. Using the above example, "In Progress" could be a parent label with "Project-Name" as a sub-label.
Organizing Gmail with labels becomes even easier if you color-code your labels to visually distinguish between projects and priorities. You could color project-related labels blue while making expense bills orange and outstanding invoices red.
5. Use Gmail Filters to Automate Workflows
You can add labels to emails manually but you can also set up filters so that every email coming from Client X, for example, gets the label Client X. Filters are a way to automate actions in Gmail. You can use them to automatically
- delete certain emails
- archive certain emails
- make sure some emails never get sent to spam
- star certain emails
- always or never mark certain emails as important
- label emails
- categorize certain emails
- forward certain emails
Especially this last function combined with automatic archiving is handy to remove some emails from your plate without needing to manually delegate them. If you don't need to sign off on certain types of expenses, you could have the bills automatically forwarded to your finance department and then archived so you don't even need to look at them.
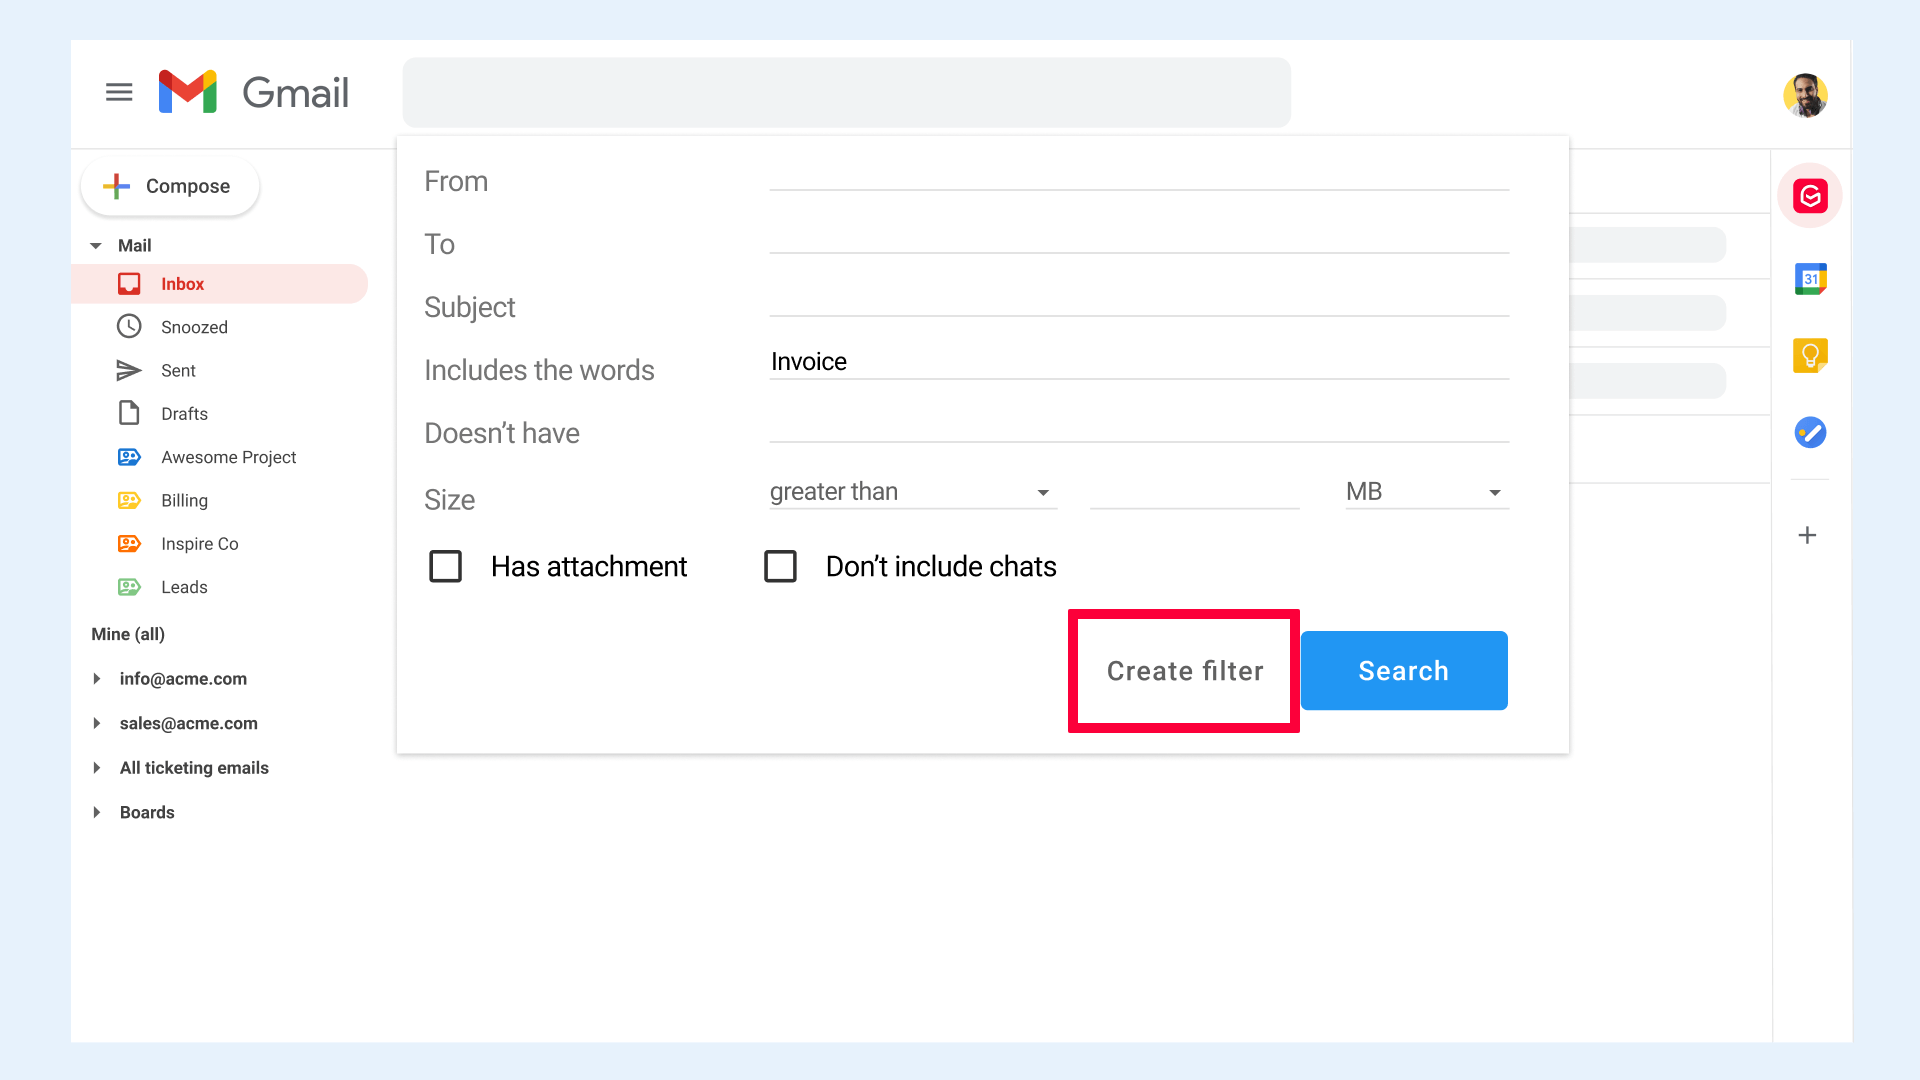
To create a new filter, click the dropdown arrow in the Gmail search bar.

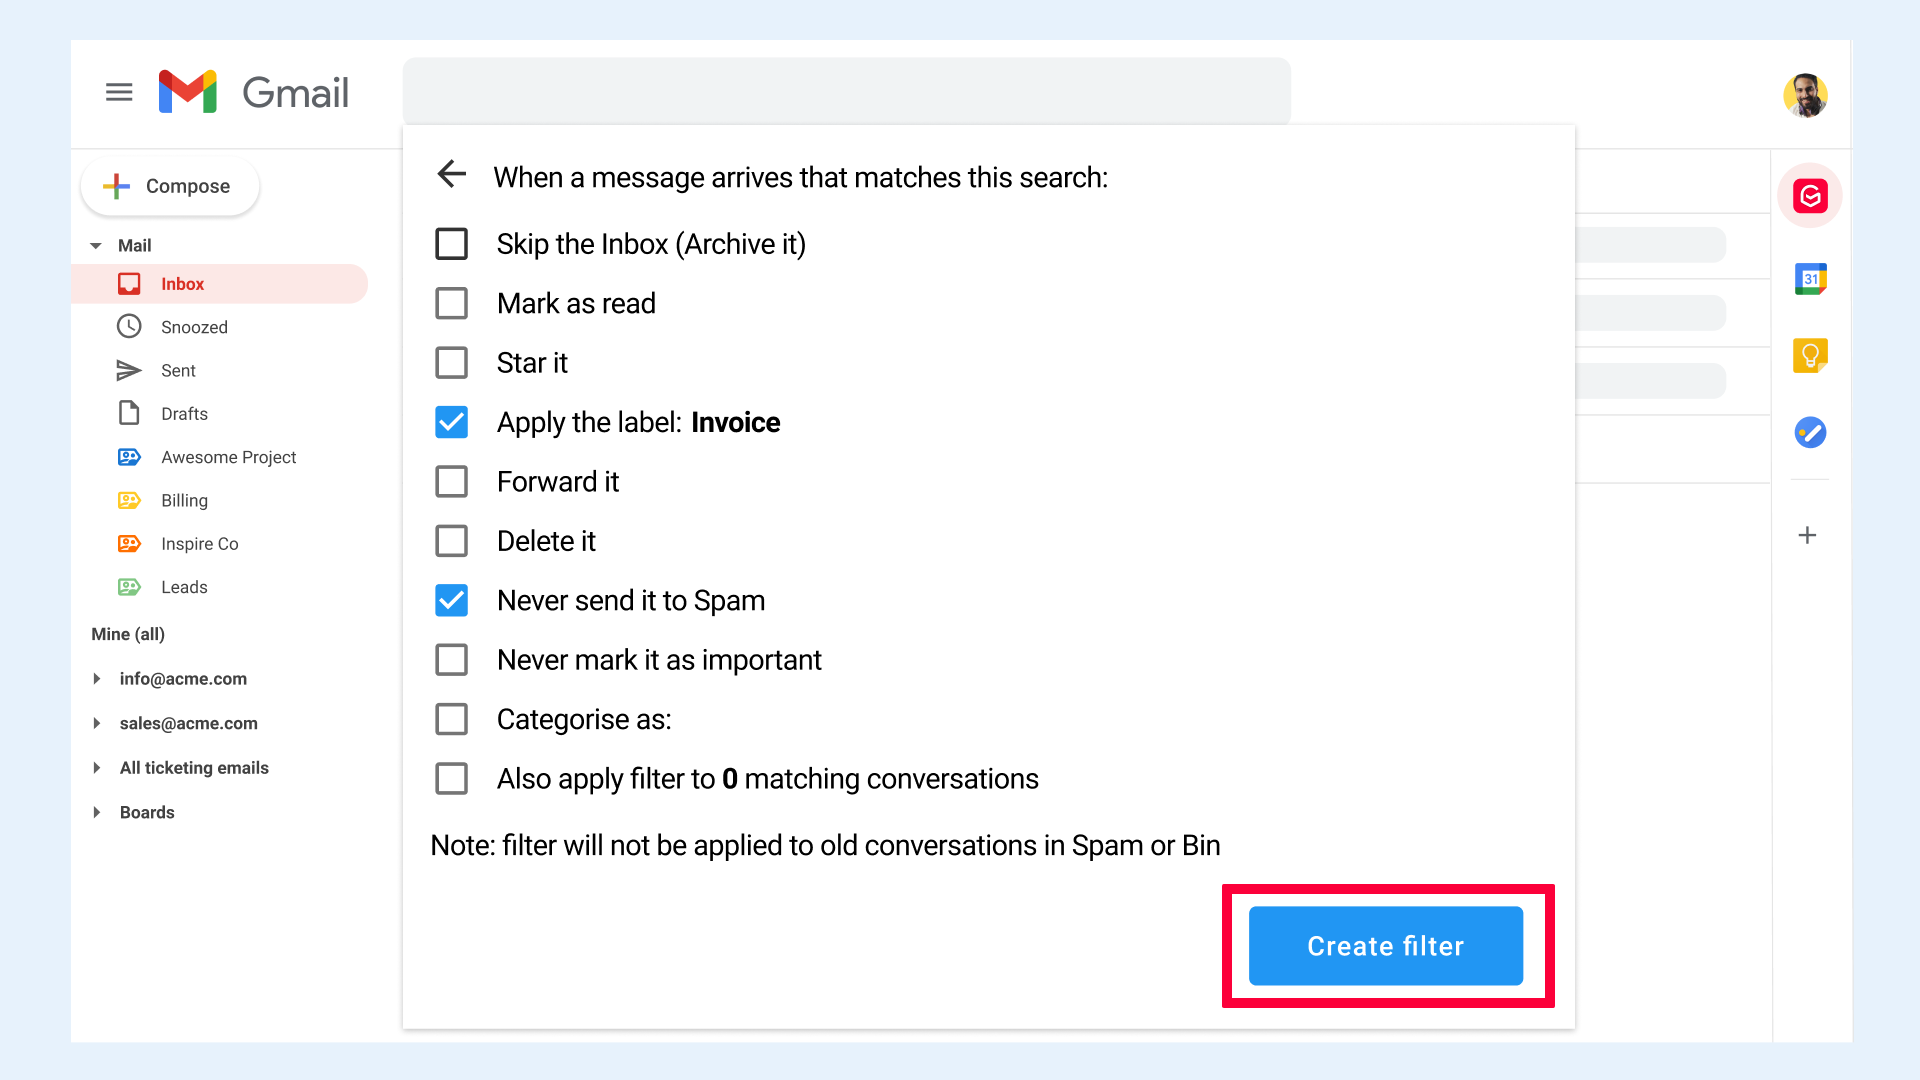
Then fill in one of your filter criteria and click "Create filter" in the bottom right corner.
Finally, set the filter automation.
To manage or delete existing filters, go to Settings > "Filters and Blocked Addresses".
6. Enable the "Send and Archive" button
Do you recognize this scenario? You're forwarding emails to team members when you suddenly get a call. By the time the call is over, you can't remember if you've forwarded that email at the top of your inbox or not. So you need to check your sent messages. This may take just a few seconds, but over the course of a week, month, year, those seconds add up.
An easy way to get that time back is by enabling the "send and archive button". You can do that by going into your Gmail Settings > General.
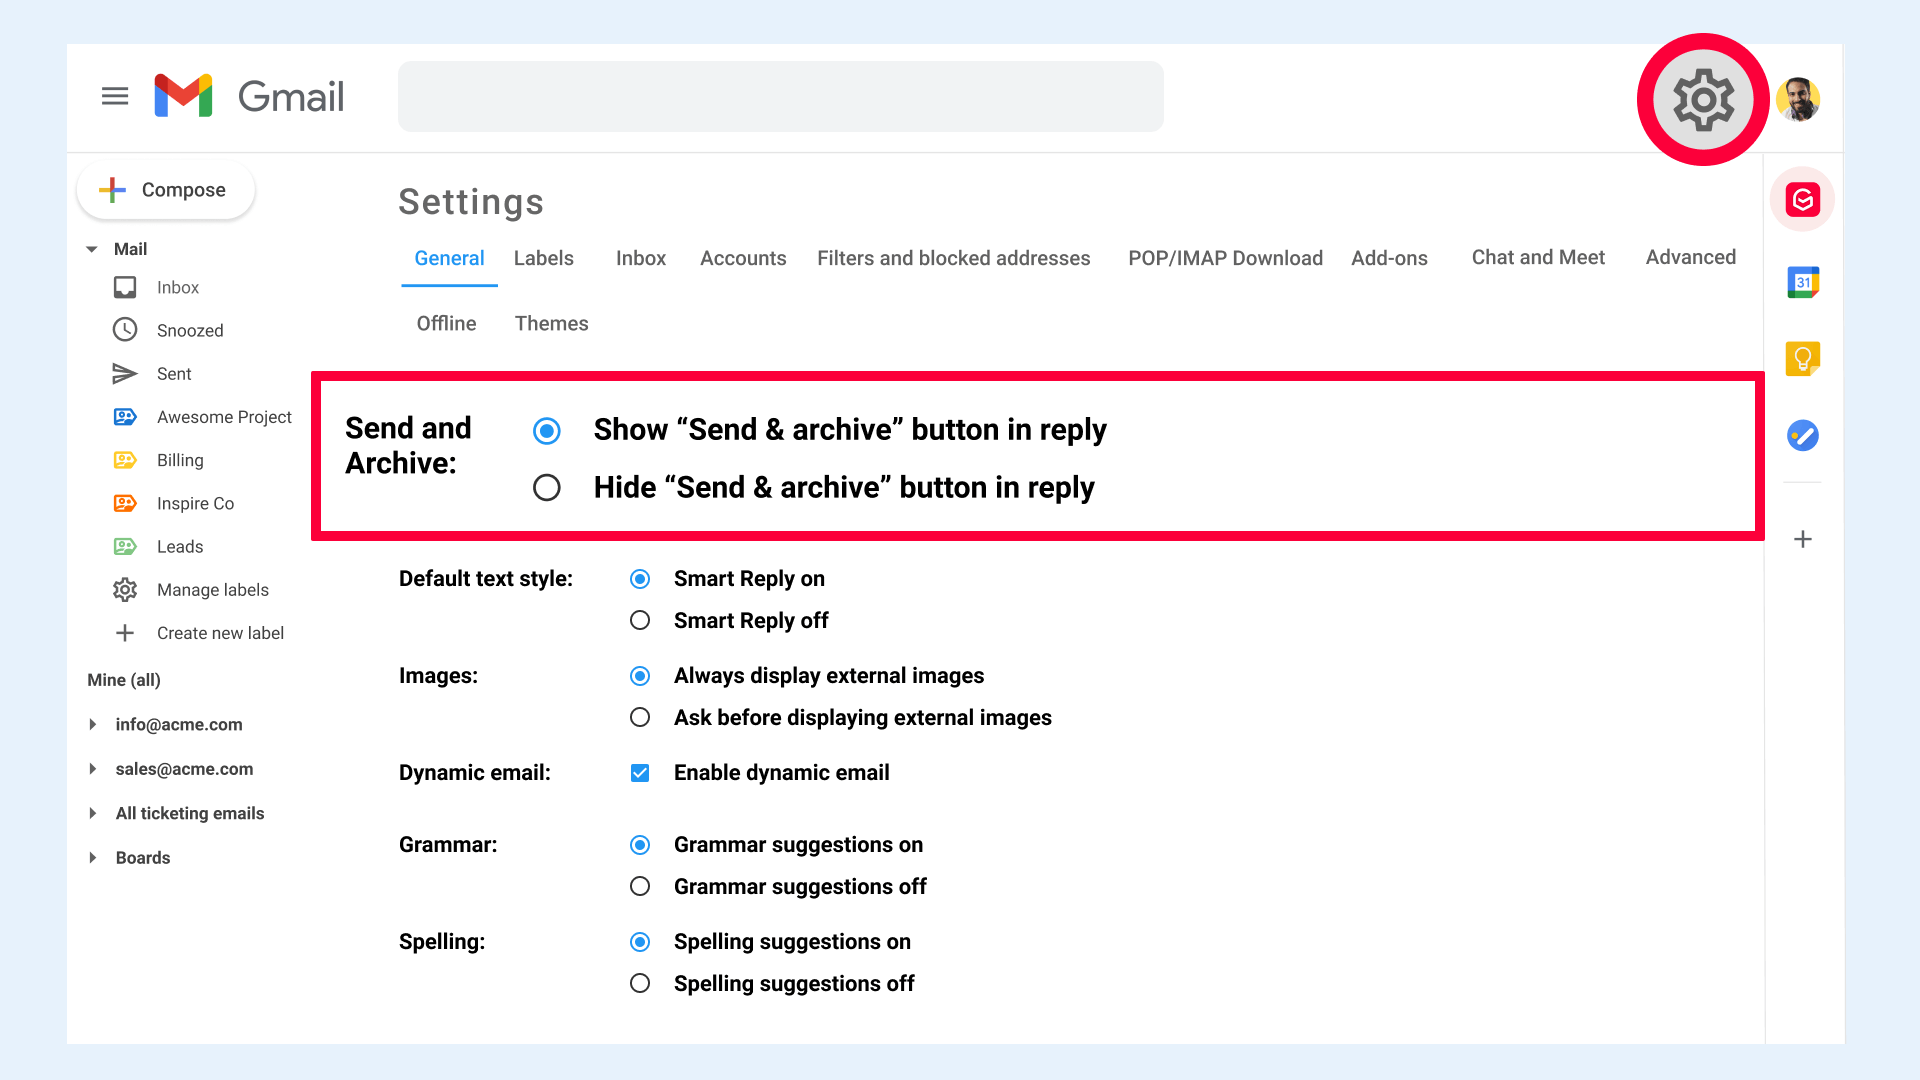
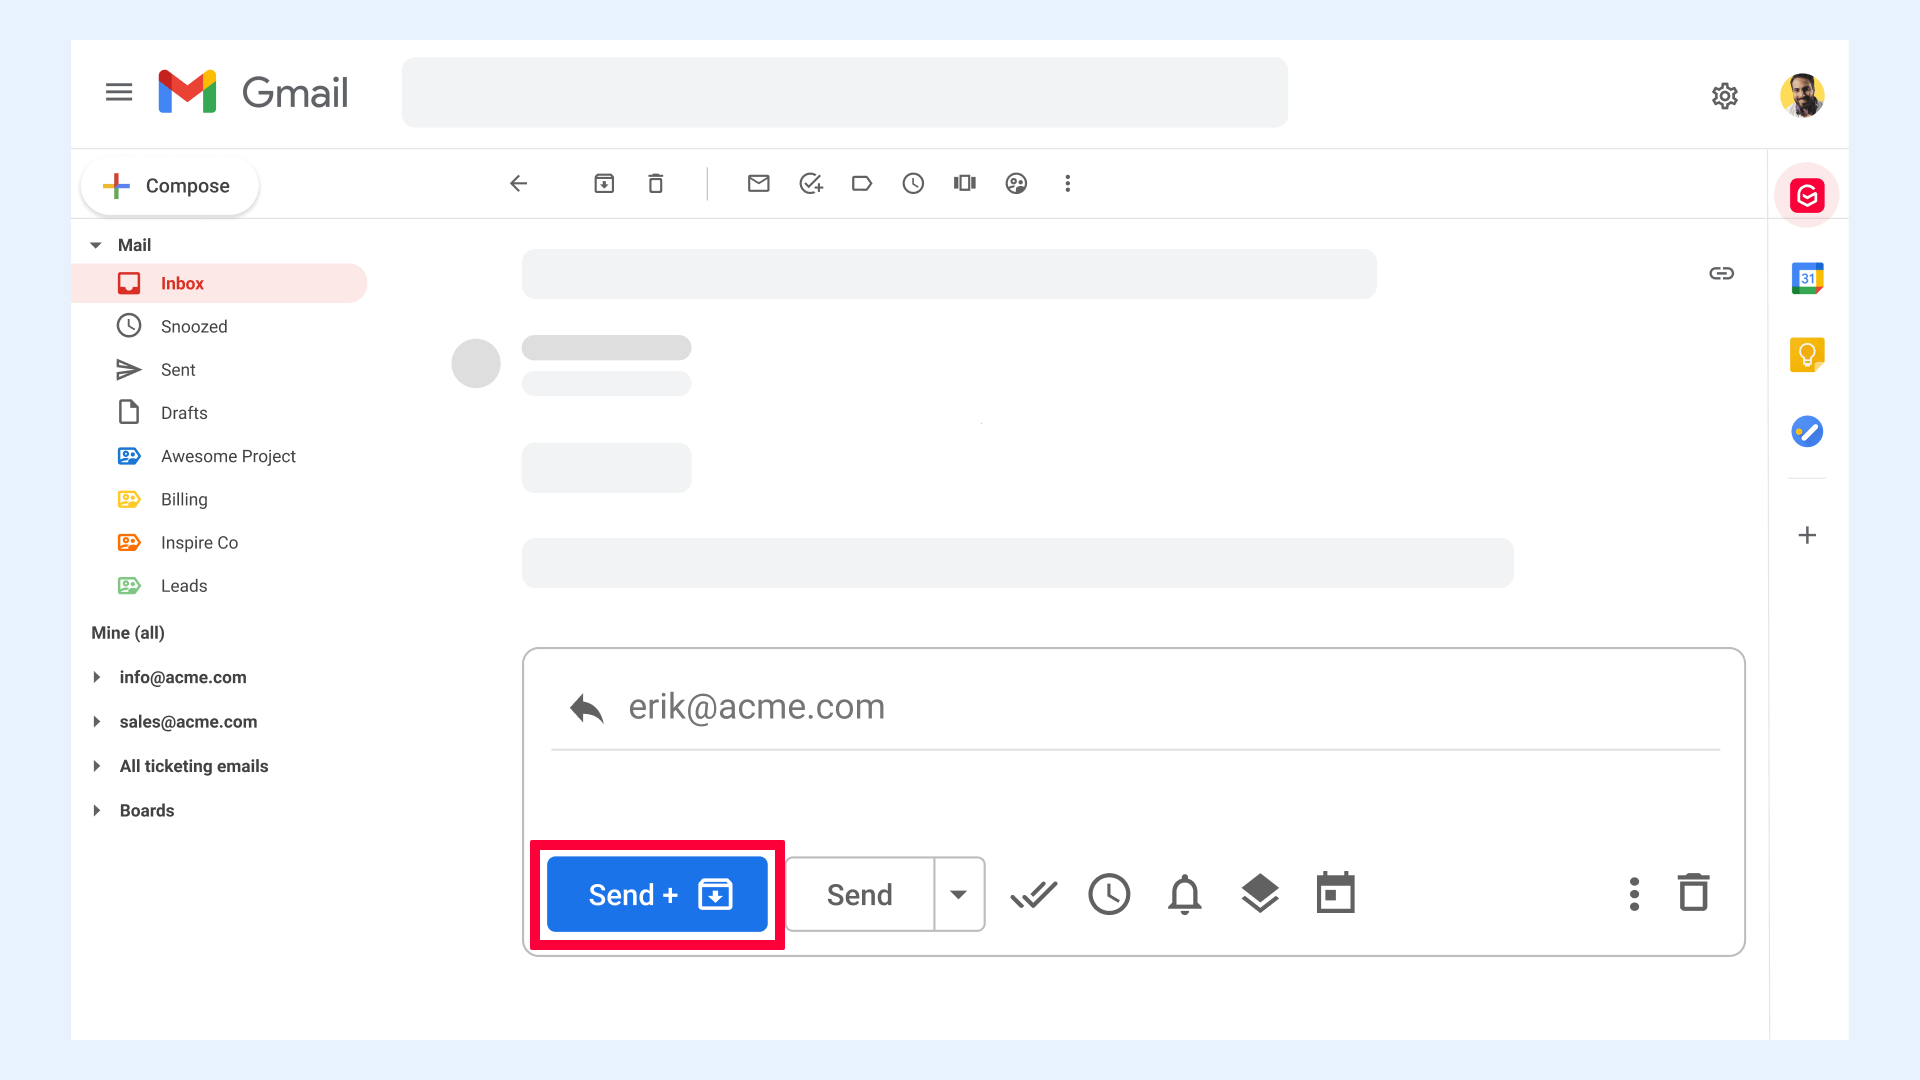
Once you've enabled the button, it'll sit to the left of your regular "send" button and what it does is - exactly - archive an email as soon as you've sent it. No need to check your send folder anymore to make sure an email has been delegated.
7. Mute Conversations that Don't Require Your Engagement
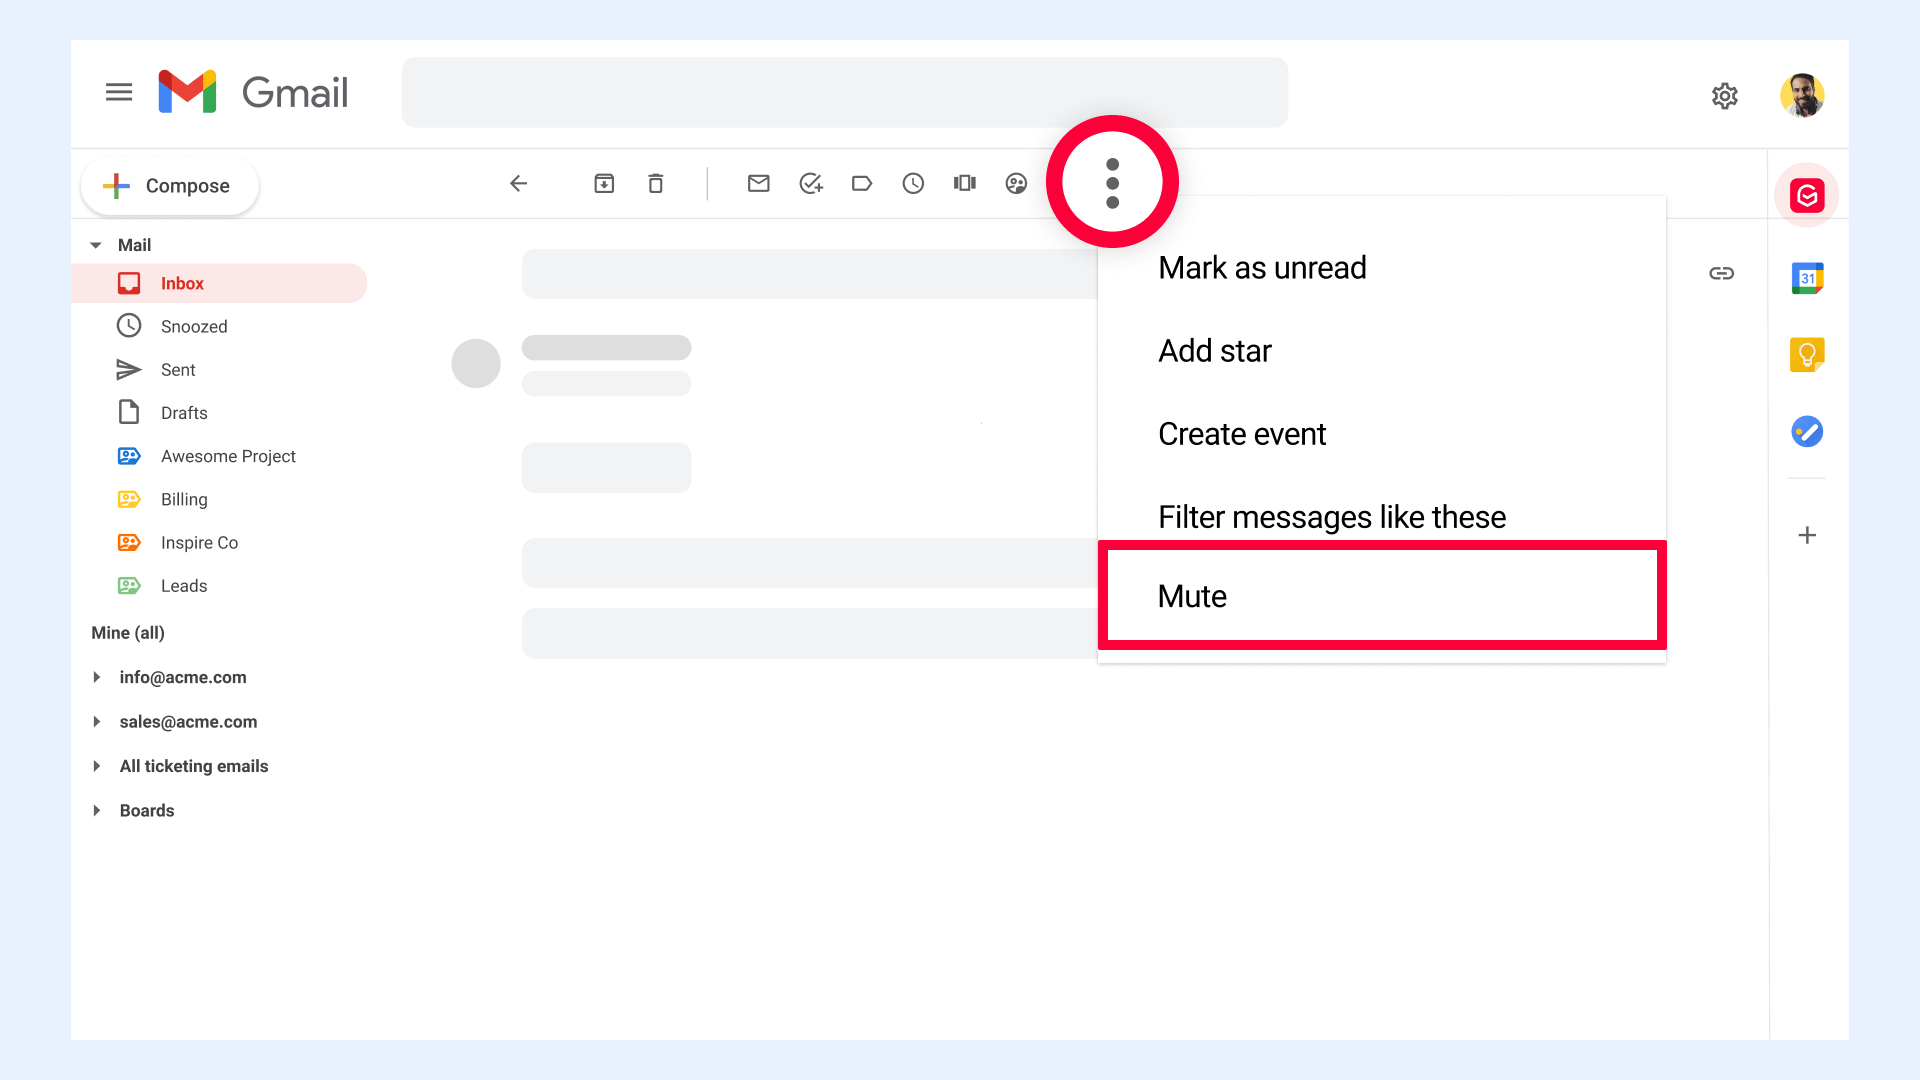
If team members often include you in email conversations that don't require your involvement, the mute function is just what you need. When you mute a conversation, any email that's part of that conversation will automatically be archived. That way, you don't lose it, but it also doesn't ask for your attention.
To mute a conversation, click the three "More" dots in the Gmail top menu and select "Mute".
8. Create a Real Shared Inbox
While the above tips work great to organize your own inbox, you might wonder how to organize your Gmail in a way that benefits not just you, but your whole team. After all, Gmail's native features still require a lot of back-and-forth between team members to assign tasks and make sure everyone receives what they need. On top of that, each extra email in a thread means a risk for information to get lost or interpreted.
The solution? A truly shared inbox.
While Gmail allows you to add delegates to your inbox who can read, send, and delete messages on your behalf, the function isn't suited to create a collaborative team environment. Here's why:
- Delegates can see all of your emails. There's no way to only share emails with certain labels.
- You can only add delegates that have the same email domain. That means that when you hire a freelancer to work on a project with your team, you'll first need to give them a company email address before you can share your - entire - inbox with them.
- There is no way to assign emails to team members. While they can see all of the emails in your inbox, you'll still need to email them or communicate in another way which emails you want them to take on.
- It's not possible to add additional information to emails. Gmail delegation really only allows you to give read, send, and delete access. It doesn't have any features to actually help you organize your Gmail.
So what's a better way to create a shared inbox?
Gmelius lets you selectively share parts of your inbox with team members while allowing everyone involved to communicate about and collaborate on shared emails. Read on to find out exactly how that works.
9. Share Gmail Labels with Team Members
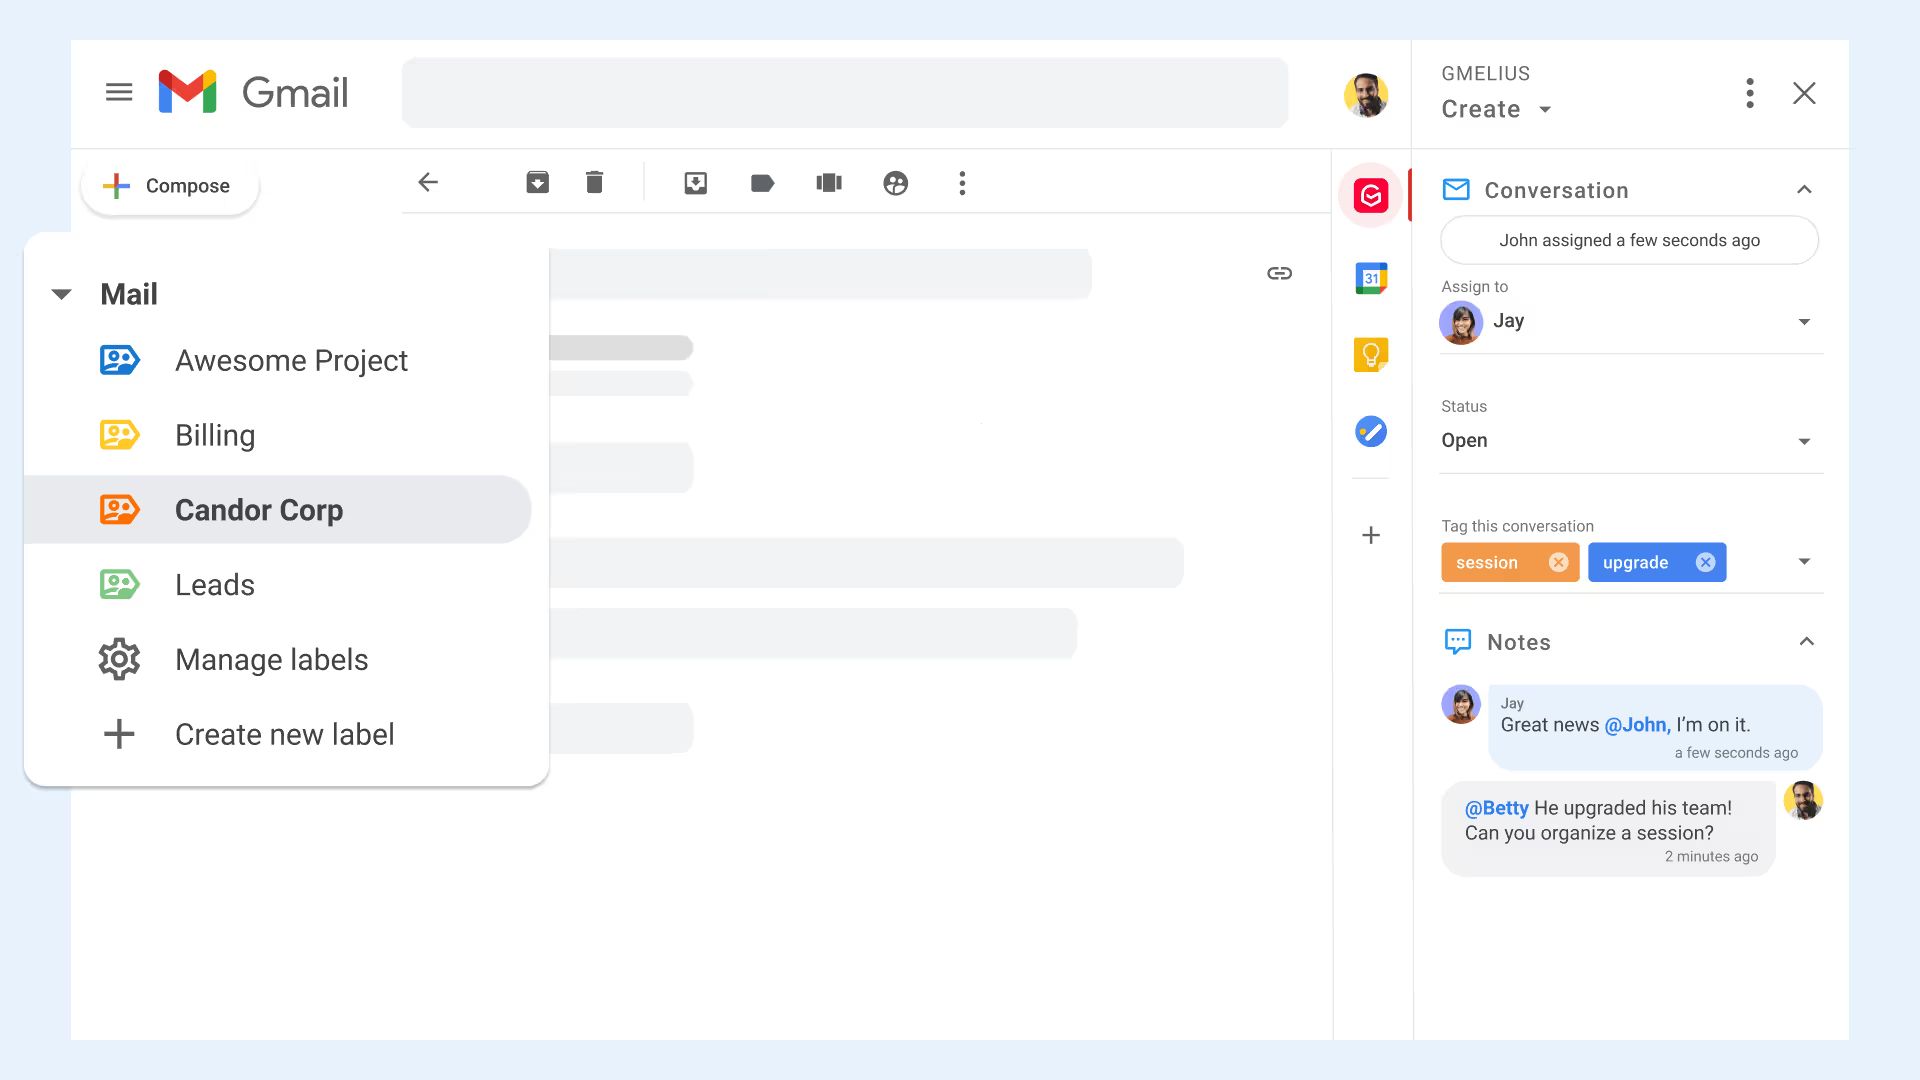
We already mentioned how to organize emails in Gmail by using labels. The issue when you're working in a team setting is that Gmail's native labels are limited to your own inbox. Gmelius allows you to share Gmail labels with team members, freelancers, and other stakeholders so that everyone has access to the emails they need while keeping their inbox free from unnecessary clutter.
Once a team member receives access to a label, they have access to all the emails under that label. This is a huge benefit compared to email forwarding, where threads may get cut off or people may miss future emails if they're not included in the thread anymore.
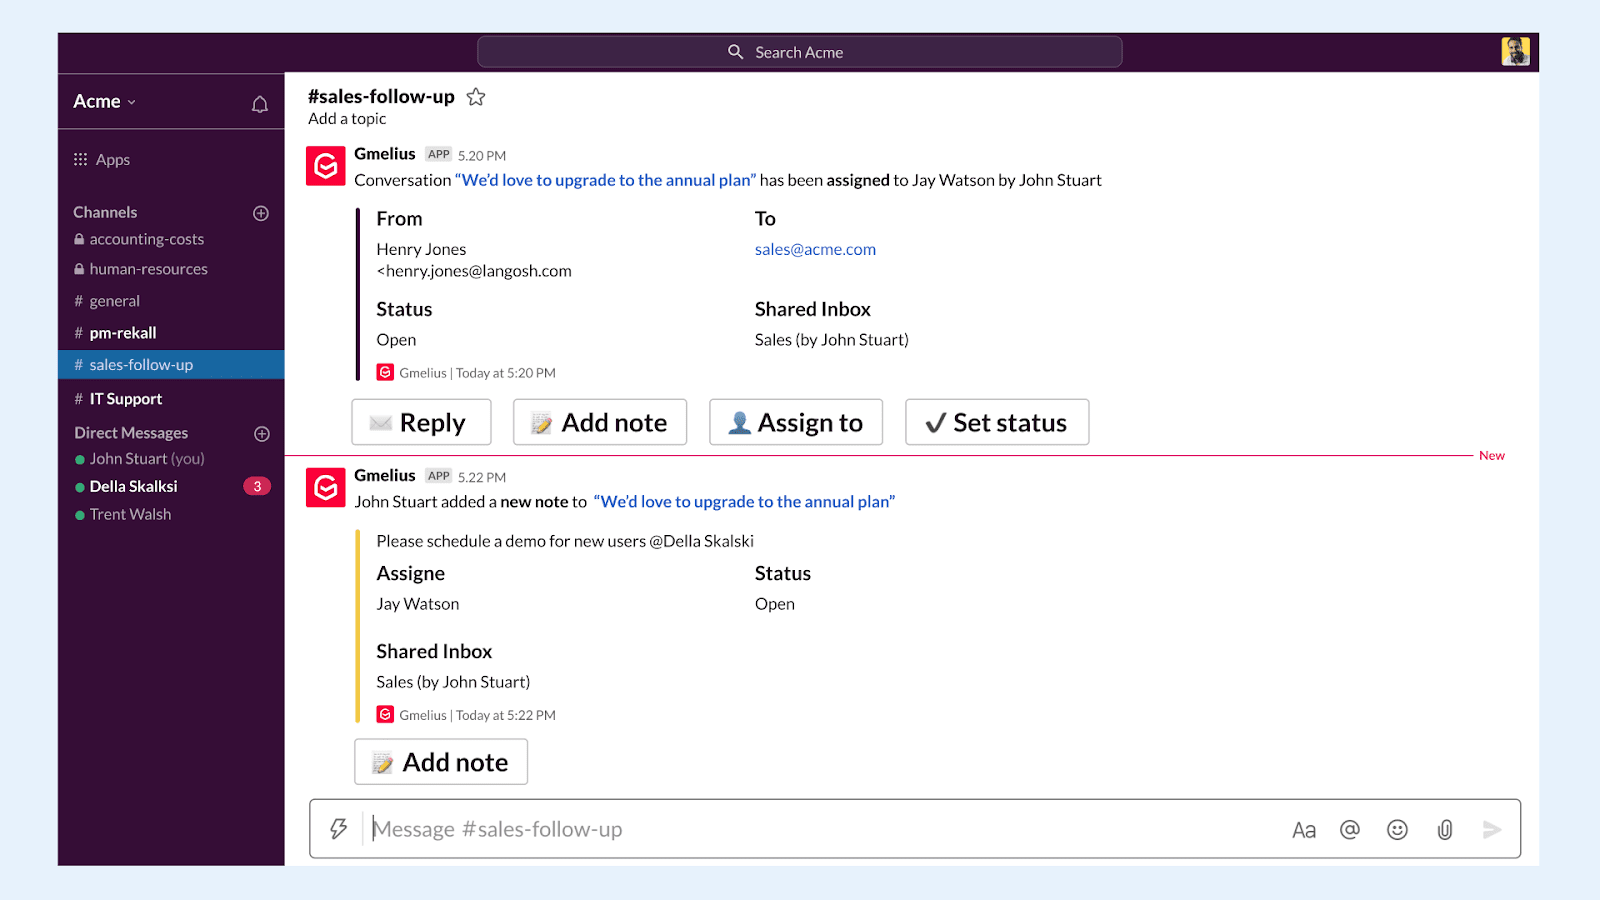
And if your team is active on Slack as well, you can sync your shared labels with Slack channels so all team members can collaborate on the same emails regardless of which communication platform they prefer.
10. Organize Gmail Labels Visually with Kanban Boards
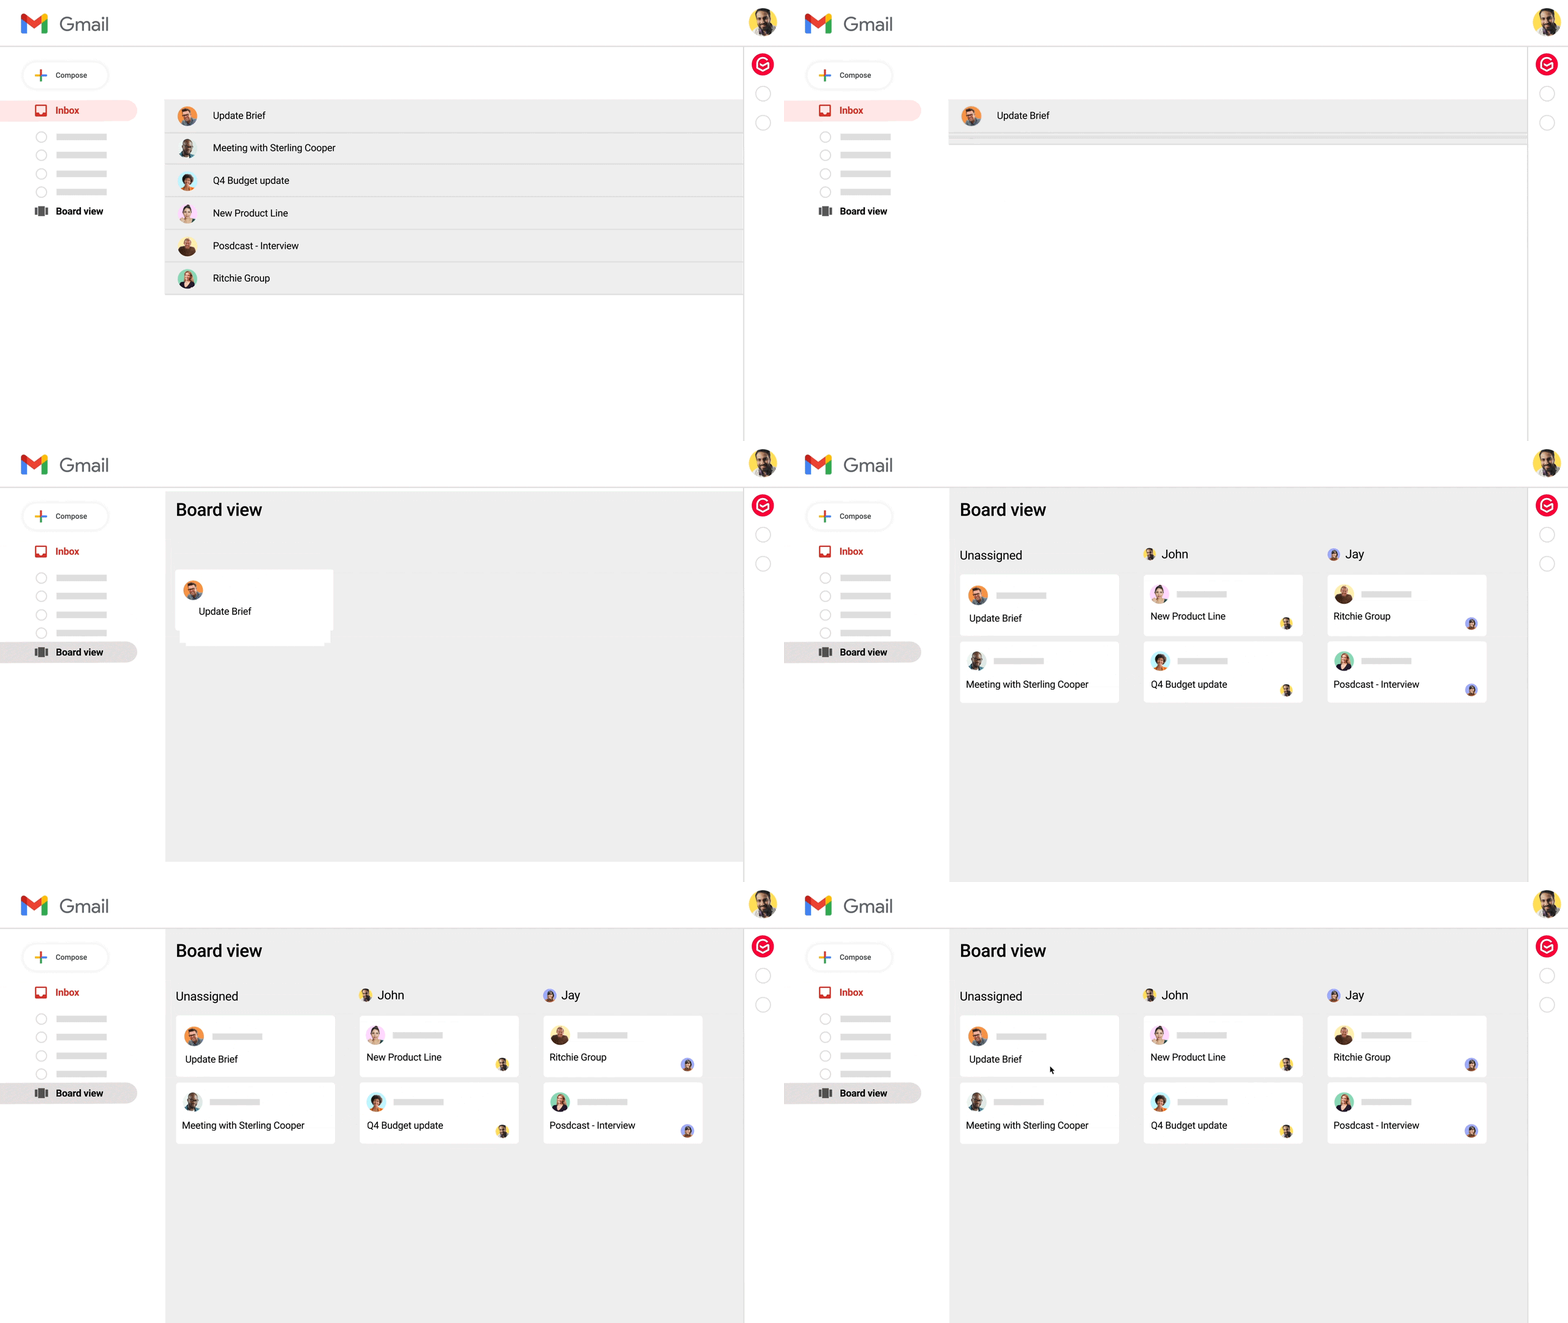
You can even take it a step further and turn your Gmail labels into Kanban Boards right inside Gmail. By doing so, all emails with those labels turn into task cards and you get a clear overview of what needs to be done. The latter is lacking when you simply use Gmail's labeling function. You then can't organize Gmail beyond getting a list view of your labels in the sidebar. It's not possible to create a workflow representation of the emails under those labels.
What's even better, is that by using Gmelius Kanban Boards, you can assign each email or task card to a team member without leaving Gmail. And if you also use Trello for project management, you can sync your Kanban Boards and your Trello boards in real-time.
11. Add Notes to Emails

How do you communicate about emails without sending even more emails to your inbox? By using Gmelius email notes for Gmail. Without having to forward any emails, collaborators can leave comments on an email thread that are are visible to team members. You can add more context to a conversation, discuss the next steps to take, and even @mention a specific team member to make sure they know what information to take action on.
Just like shared labels, Gmelius Gmail notes sync with Slack so there's no need to switch between apps. You'll be notified of new comments on shared email threads regardless of which tool you're working in.
Organize Gmail Today and Increase Your Team's Productivity
Now that you know the best way to organize Gmail, there's nothing stopping you from optimizing your team's workflows and turning your inbox into a true productivity tool. Go beyond individual inbox management by sharing Gmail labels with team members and visualize email tasks with collaborative Kanban Boards.
Sign up for Gmelius today to unlock these powerful features for Gmail and more.

