Do you know that half of US adults get hacked every year? Imagine what it would be like if your personal or company's Gmail account also got hacked. Not a pleasant thought...
Follow these 7 steps to ensure that your Gmail security is top-notch and you are no longer at risk of being compromised.
Step 1 Towards a Better Gmail Security: Activate Two-Step Verification
Google’s concern over account theft issues has resulted in the introduction of a security feature known as 2-Step Verification. Two-Step Verification provides an extra layer of Gmail security. Every time you wish to access your account, a code will be sent to your phone; thus making it impossible for another party to guess your password.
To activate 2-factor authentication, click here and follow the on-screen instructions.
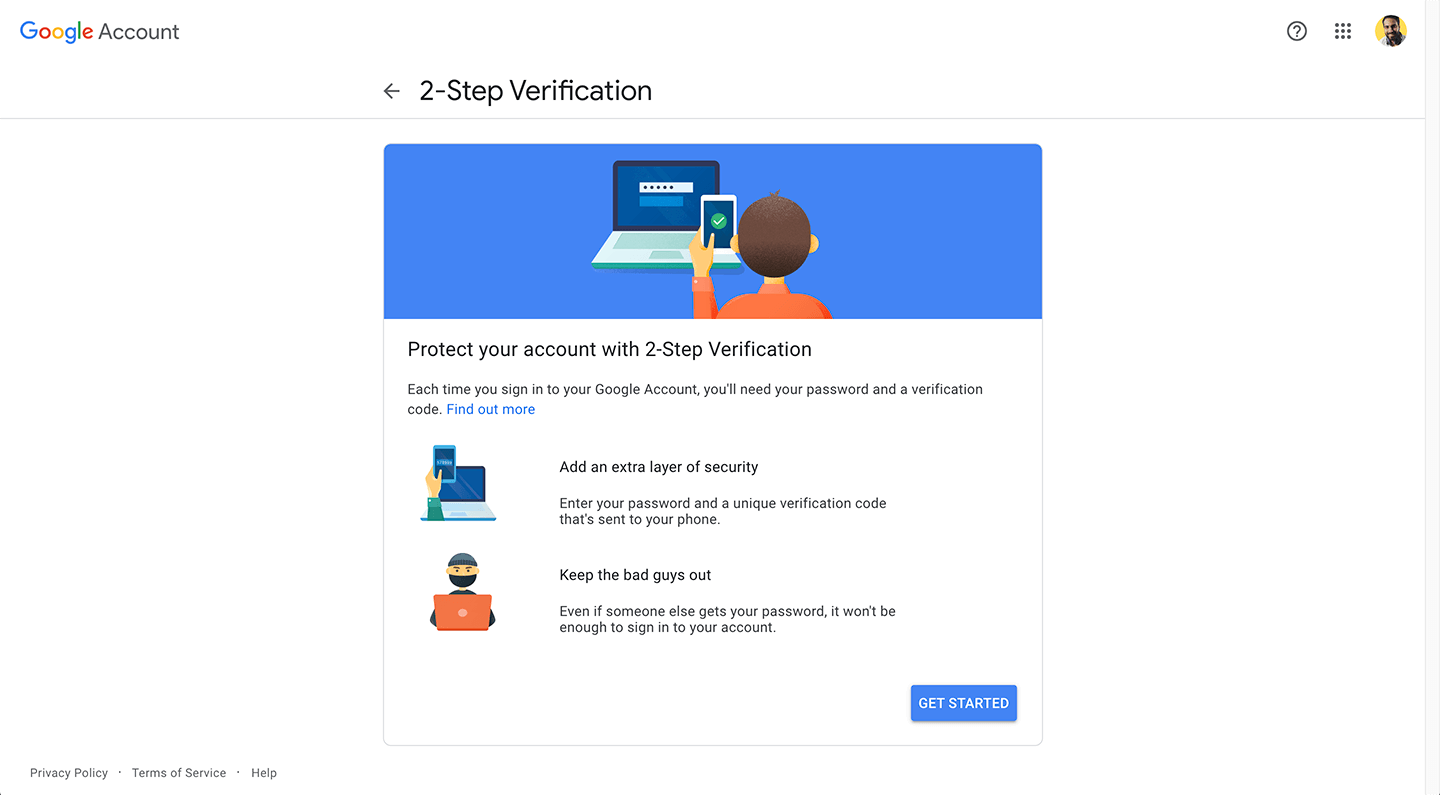
Note that you'll need a mobile phone to activate this functionality. Should you lose your phone, you can create printable backup codes and a backup phone number as alternatives for accessing your account. You can also create an application-specific password for applications that don’t request a verification code.
It might sound annoying and probably will be the first few times, but it’s certainly the best way to have foolproof Gmail security and not be worried about having your Gmail account hacked.
Looking to boost productivity and email management? Try Gmelius for free!
Step 2: Don't Share Your Gmail Passwords and Use Shared Inboxes Instead
If your team uses a group email address such as info@, sales@ or support@, multiple team members need access to it.
Sharing one password is far from being the most secure solution. Instead, the recommended practice is to create shared inboxes for your group email addresses.
Shared Inboxes allow you to invite relevant team members, and let them manage group emails together directly from their respective inboxes. The best solutions on the market make it also possible to assign emails to specific team members, change the status of a conversation, and add tags for more context.
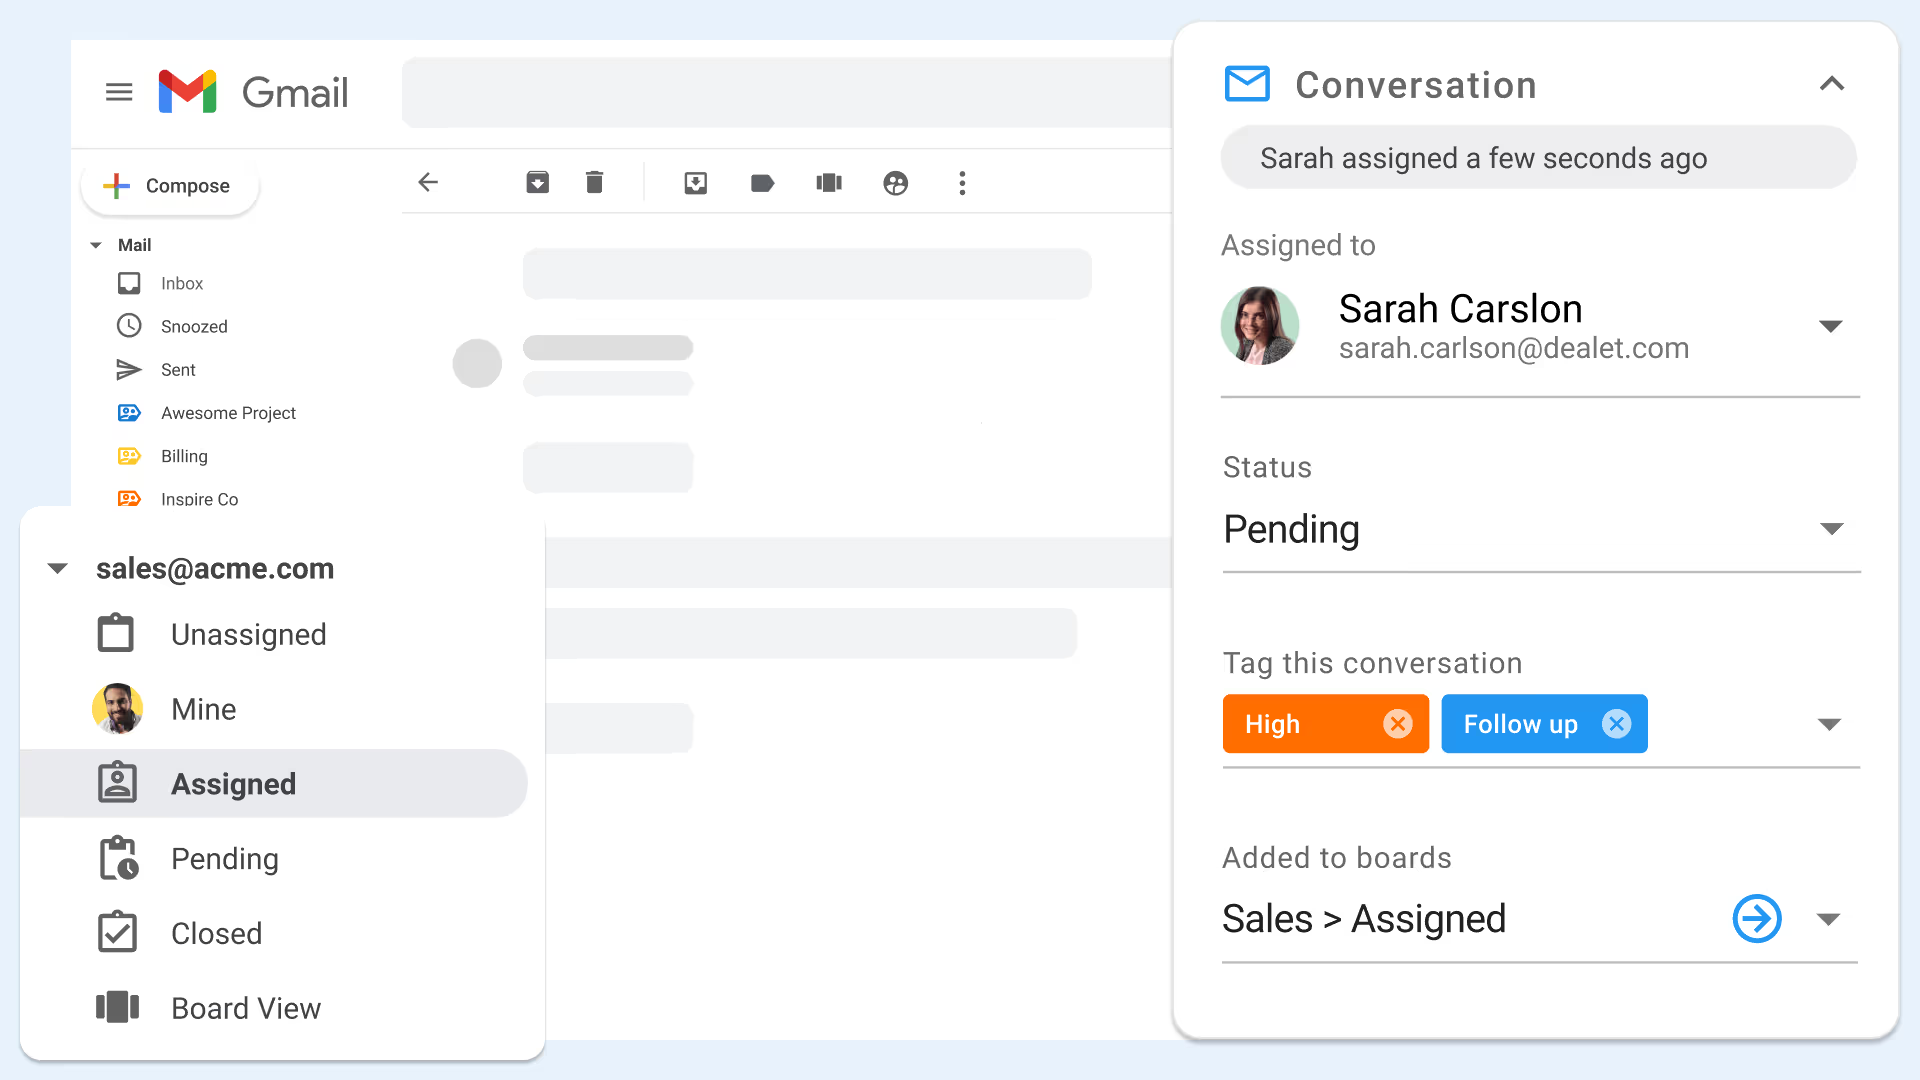
Another benefit of the shared inbox model is that your team can forget about duplicate and colliding replies. Teammates will see each other’s avatars if they are viewing an email, and the red ellipsis will pulse in real-time if they are replying.
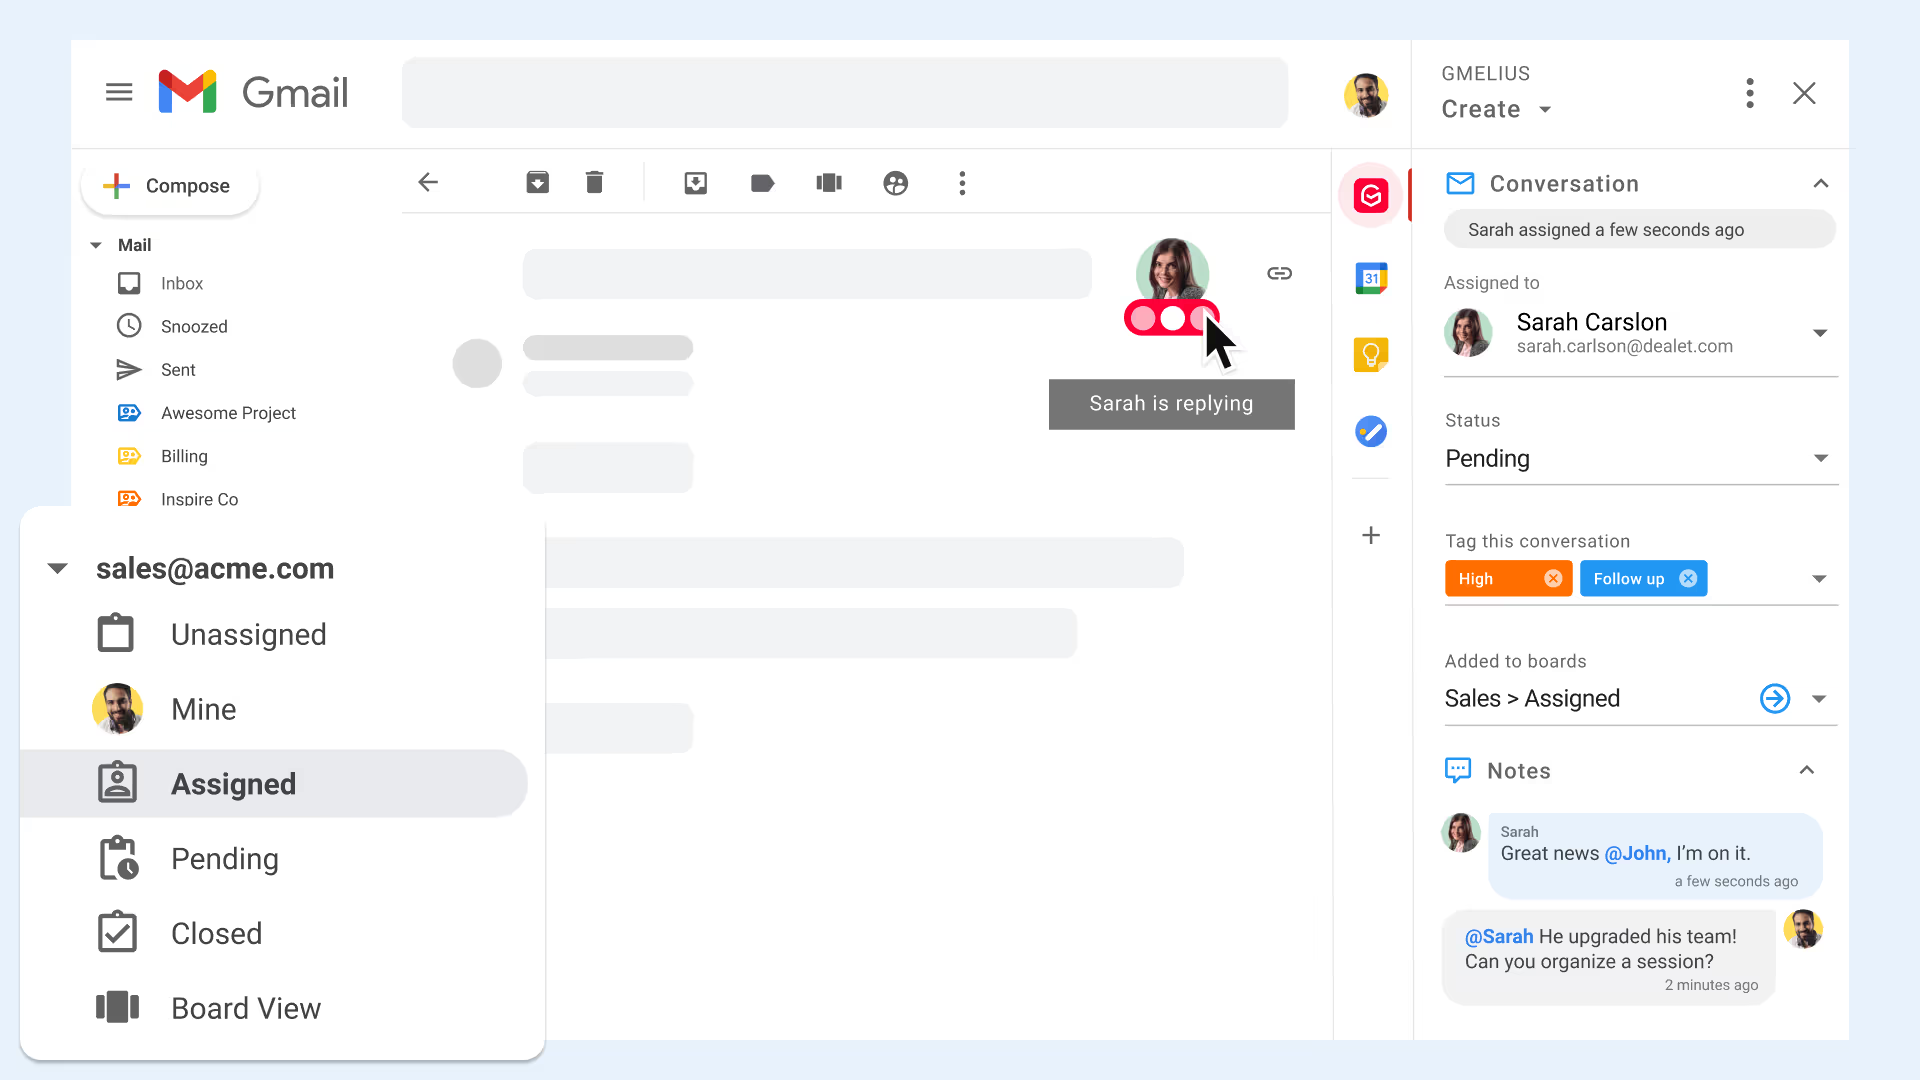
Unsure whether shared inboxes could make sense in your company? Feel free to check out this article on what exactly is a shared inbox and how it works.
Step 3: Revoke Access to 3rd Party Apps
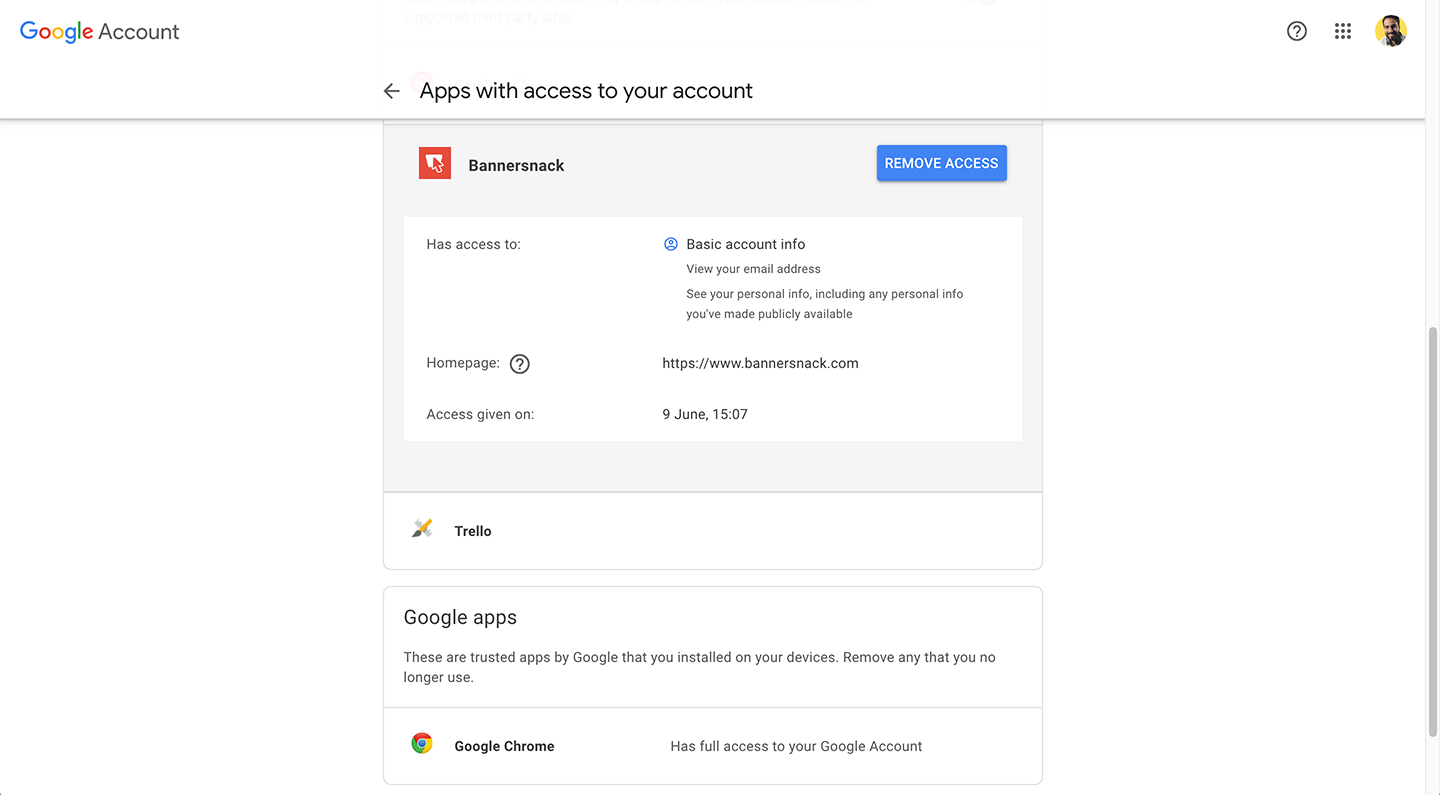
You may have signed up to a certain website using your Google credentials or installed third-party extensions/apps over time. Some of those may put your Gmail account at risk one day. The best practice is to always revoke access to apps you no longer use to mitigate any risks.
Head to your Google’s account permissions page to revoke access to anything you don’t want to keep. Ensure to repeat this step from time to time, e.g., once quarterly.
Step 4: Check for Suspicious Activity
If Google notices suspicious activity in your account they’ll send you a notification. It may be that there are sign-ins from an unfamiliar location or an unfamiliar device. Ideally you should also manually review your account at least once a month to make sure that no suspicious activity has taken place.
To review your account, click on the link 'Details' located on the right hand side of the footer of your mailbox.

You’ll see a list of sign-ins and alerts that have been blocked, including sign-ins from new devices.
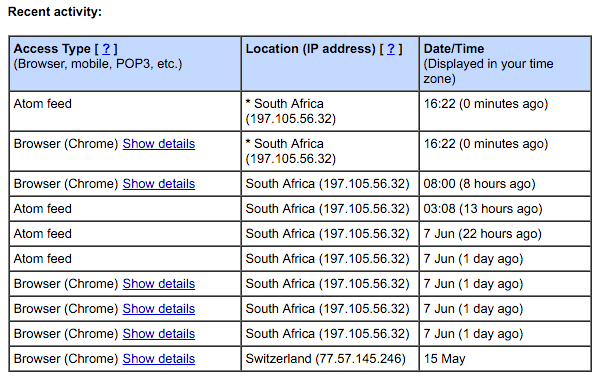
Should you notice unusual activity, try to recall why this activity seems unfamiliar. If you can’t recall the activity and you’re unsure as to why it exists, your best action is to change your password immediately and enable 2-factor authentication (remember step 1 above?).
Step 5: Check Your Account Filters for Forwarding Emails
It’s important that you to ensure that there are no active filters in your account which may be forwarding your email to a third-party email address. This check is simple: Go to your Gmail Settings' page and click on the Filters tab. Look for filters you haven’t authorised or don't use and delete them.
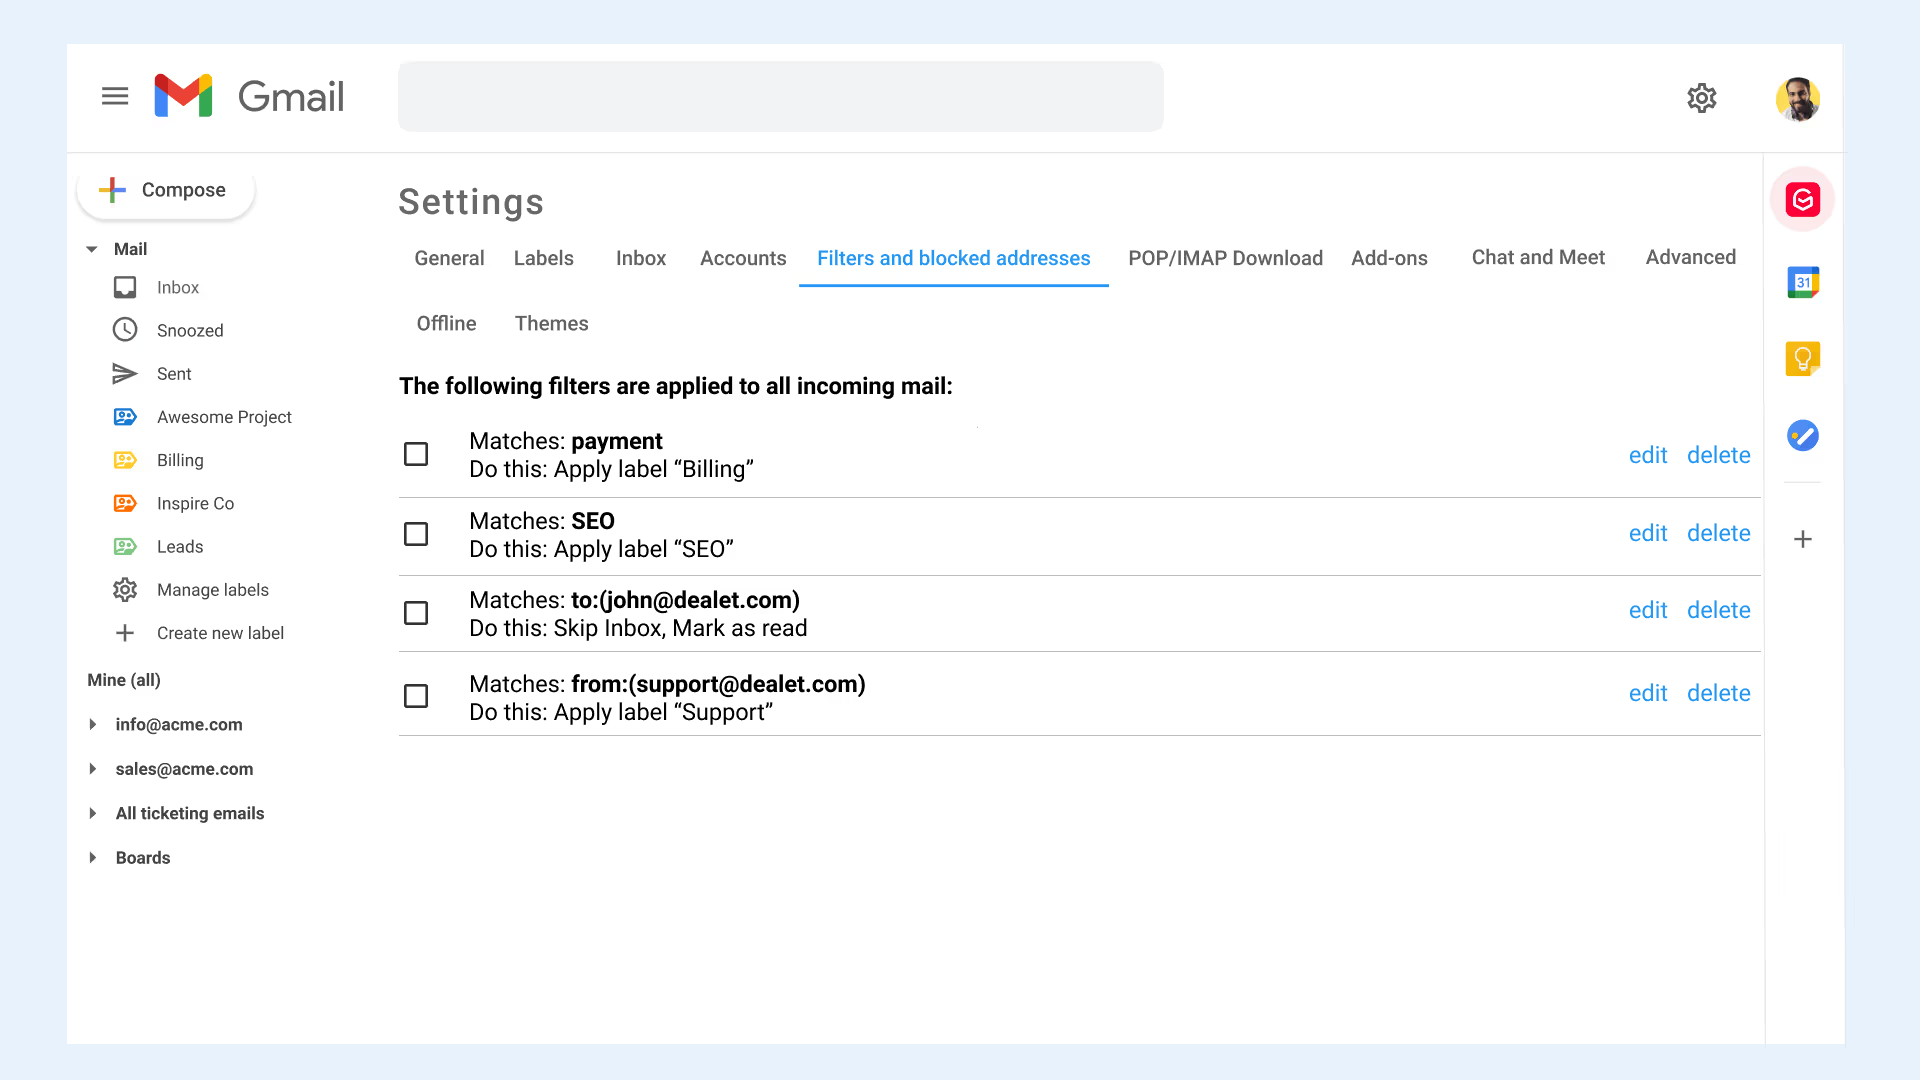
In addition, check the Forwarding and POP/IMAP tab to ensure there’s no unauthorized forwarding address other than those approved by you.
Step 6: Authenticate Your Emails When Sending Sensitive Information
On receiving an email, you may notice that next to the sender’s email address there’s a small red padlock. This indicates that the message is potentially unsafe.
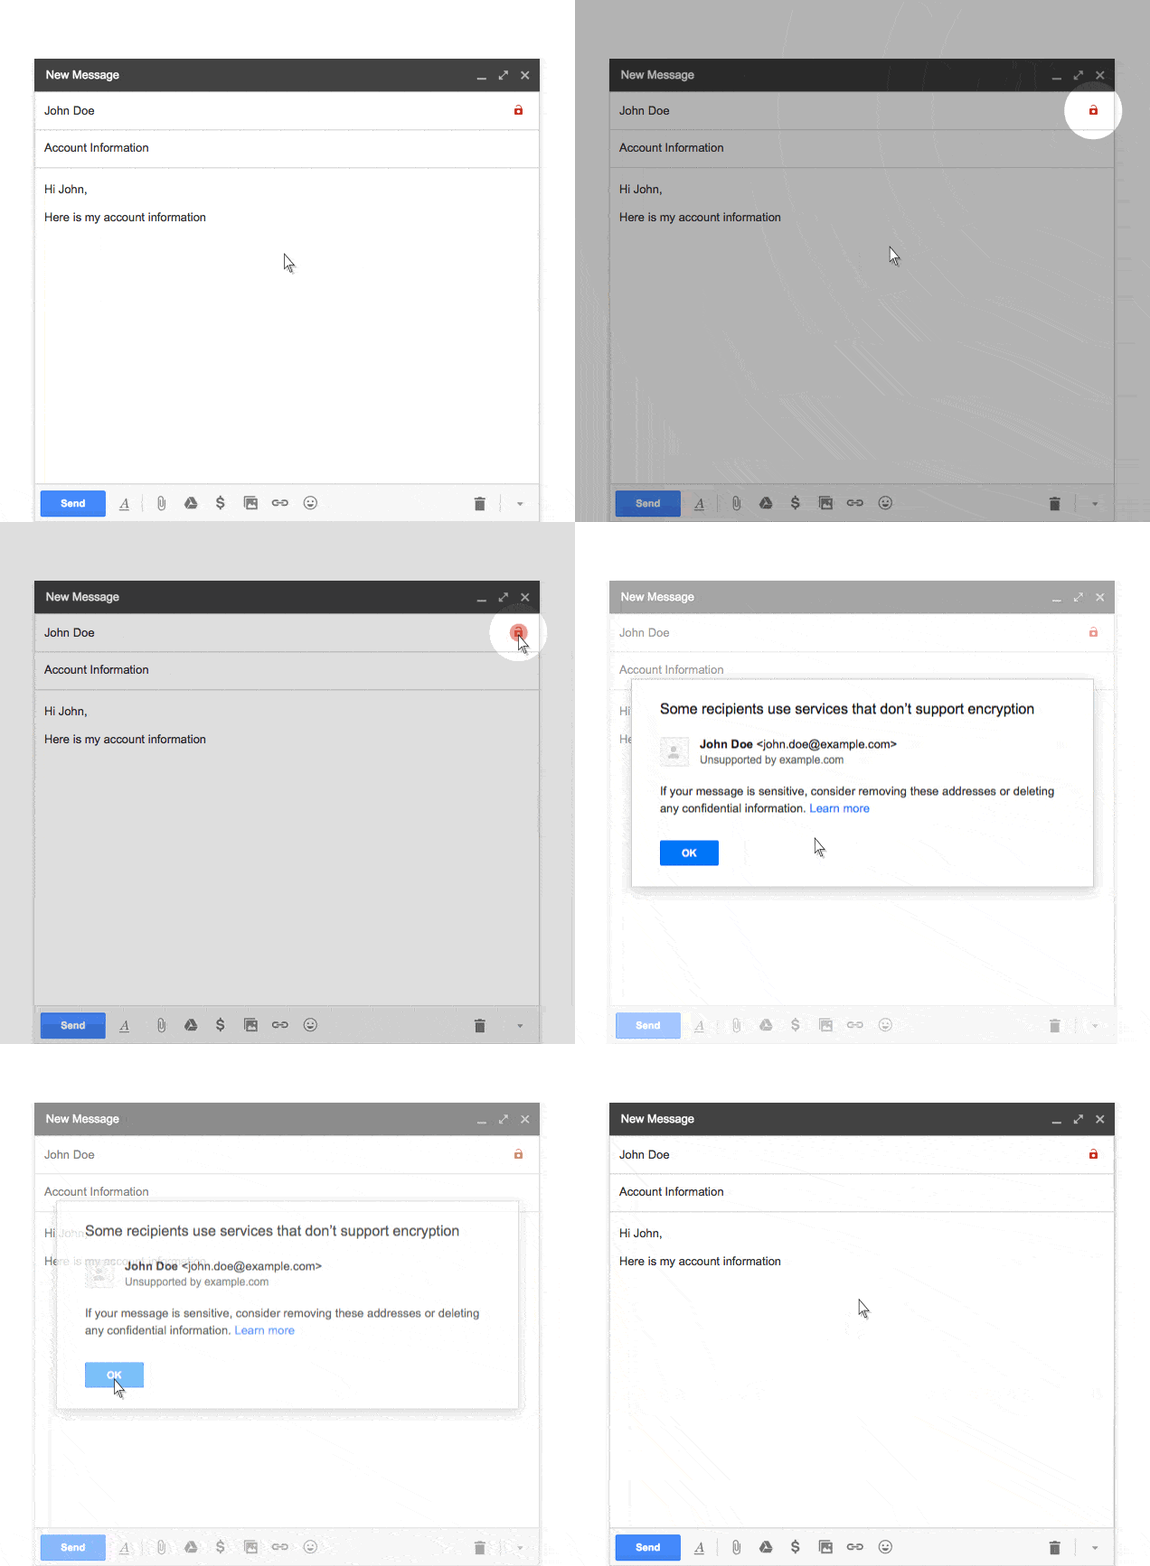
This red unlocked icon comes with emails that have not been authenticated by Transport Layer Security (TLS) encryption. Don't worry too much if you don't understand how the technology works. You only need to be concerned if you see this icon and the message has something to do with passwords or other sensitive information. At this point you need to contact the sender of these insecure emails if want to continue exchanging messages with this person.
Step 7: Detect and Block Email Trackers
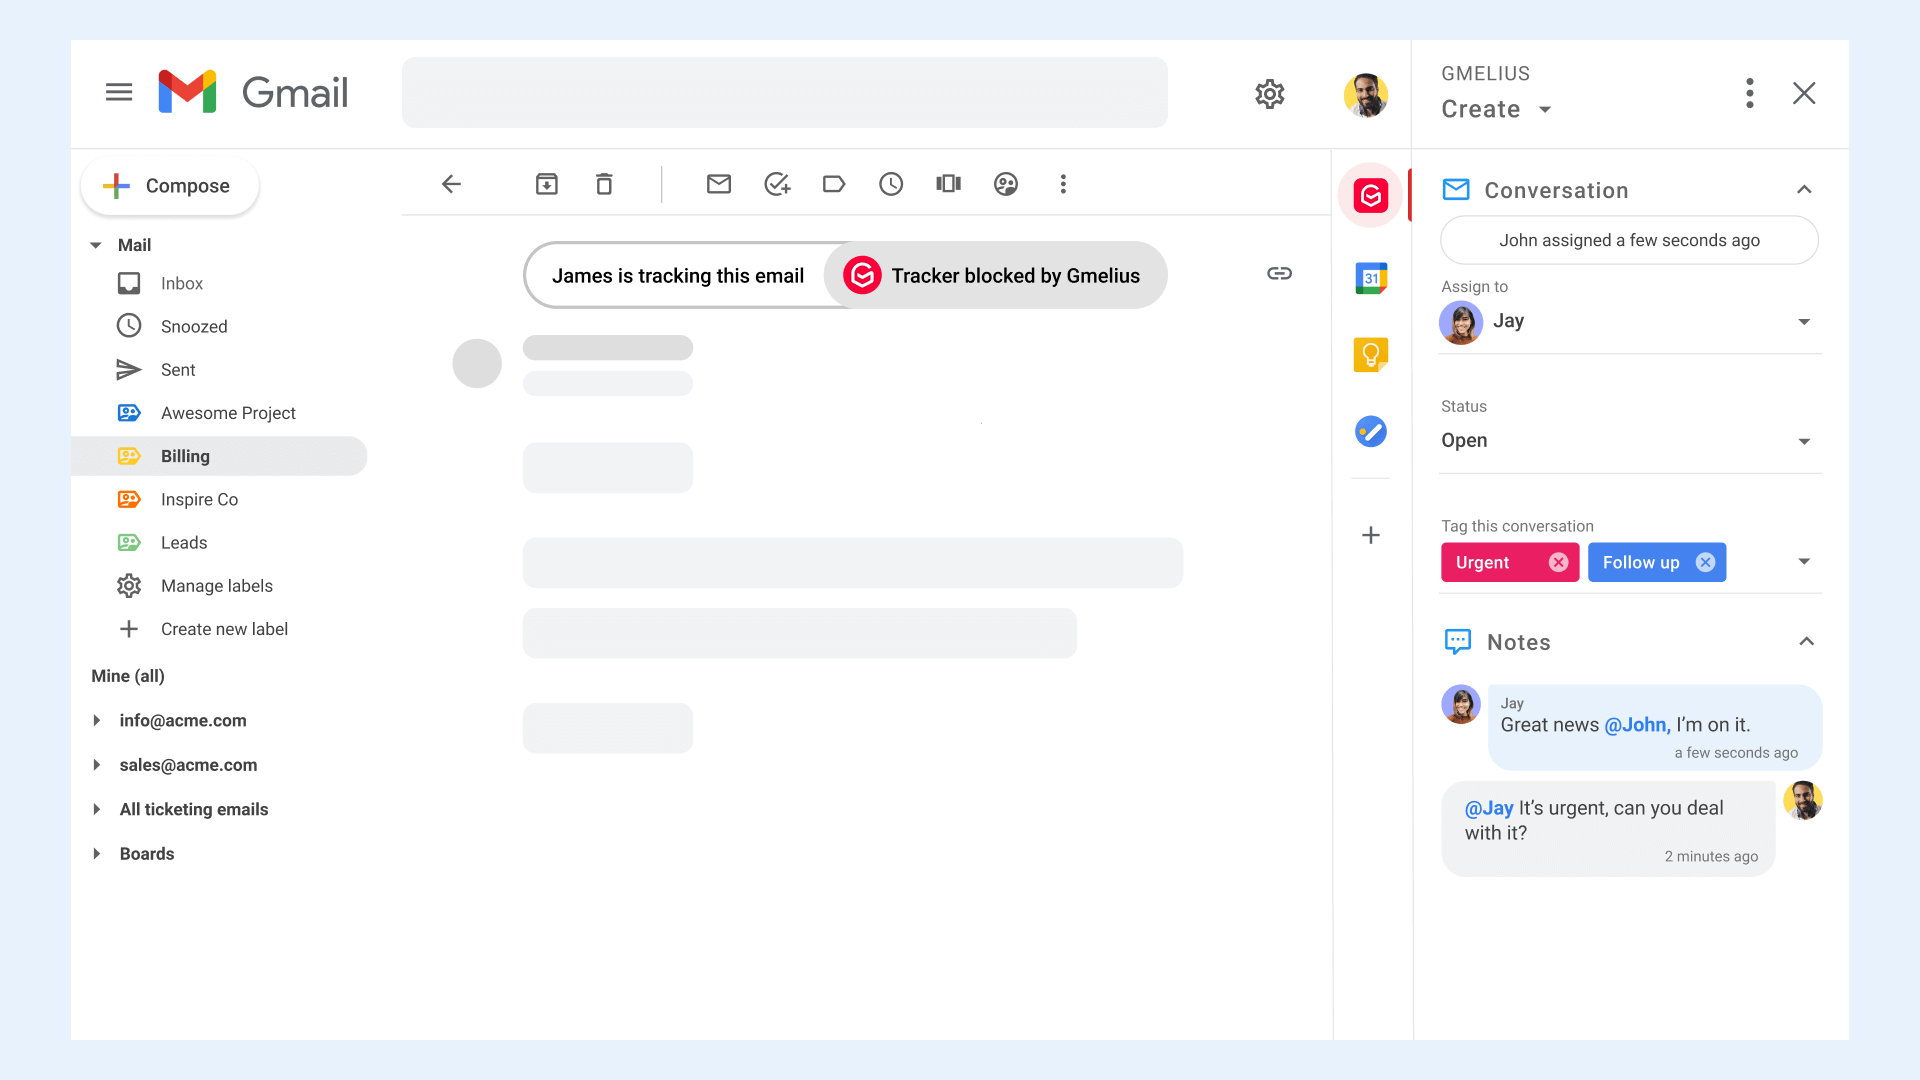
You may not be aware that many people and companies track emails they send nowadays. With this information, they may know exactly when, where, and how many times you’ve read their message. You can detect and block such trackers by installing extensions. We recommend to use our own tool to achieve this as we know our code is clean and we don't store nor transmit your Gmail data. Learn more here.
Gmail Security - In Conclusion
By taking the above simple steps you can be assured that your Gmail inbox and the ones of your teammates are safer. Like always when speaking of e-security, be on the lookout for notifications from Google advising that you need to add additional Gmail security in order to stay on top of any new potential vulnerabilities.
We encourage you to share these quick actionable steps with your teammates and family members as they're simple to implement but can really make a difference for the integrity and security of their Gmail inboxes. This short guide is available at:
https://gmelius.com/blog/gmail-security
https://fr.gmelius.com/blog/gmail-security (Version française)
With Gmelius, security and productivity come first. Try it now!


